Serbia Trip Report June 2023

Serbia Trip Report June 2023

Due to the pandemic, the last time I used these hides in Serbia was in 2019 so I was eager to get back. It was a wonderful feeling to be back here again and I can honestly say the hides were as good as ever – in fact, this year I’d say they delivered some of the best opportunities I’ve ever seen. I met my 3 clients, Mike, Karen and Ray at Belgrade Airport before taking our transfer north to Vojvodina.

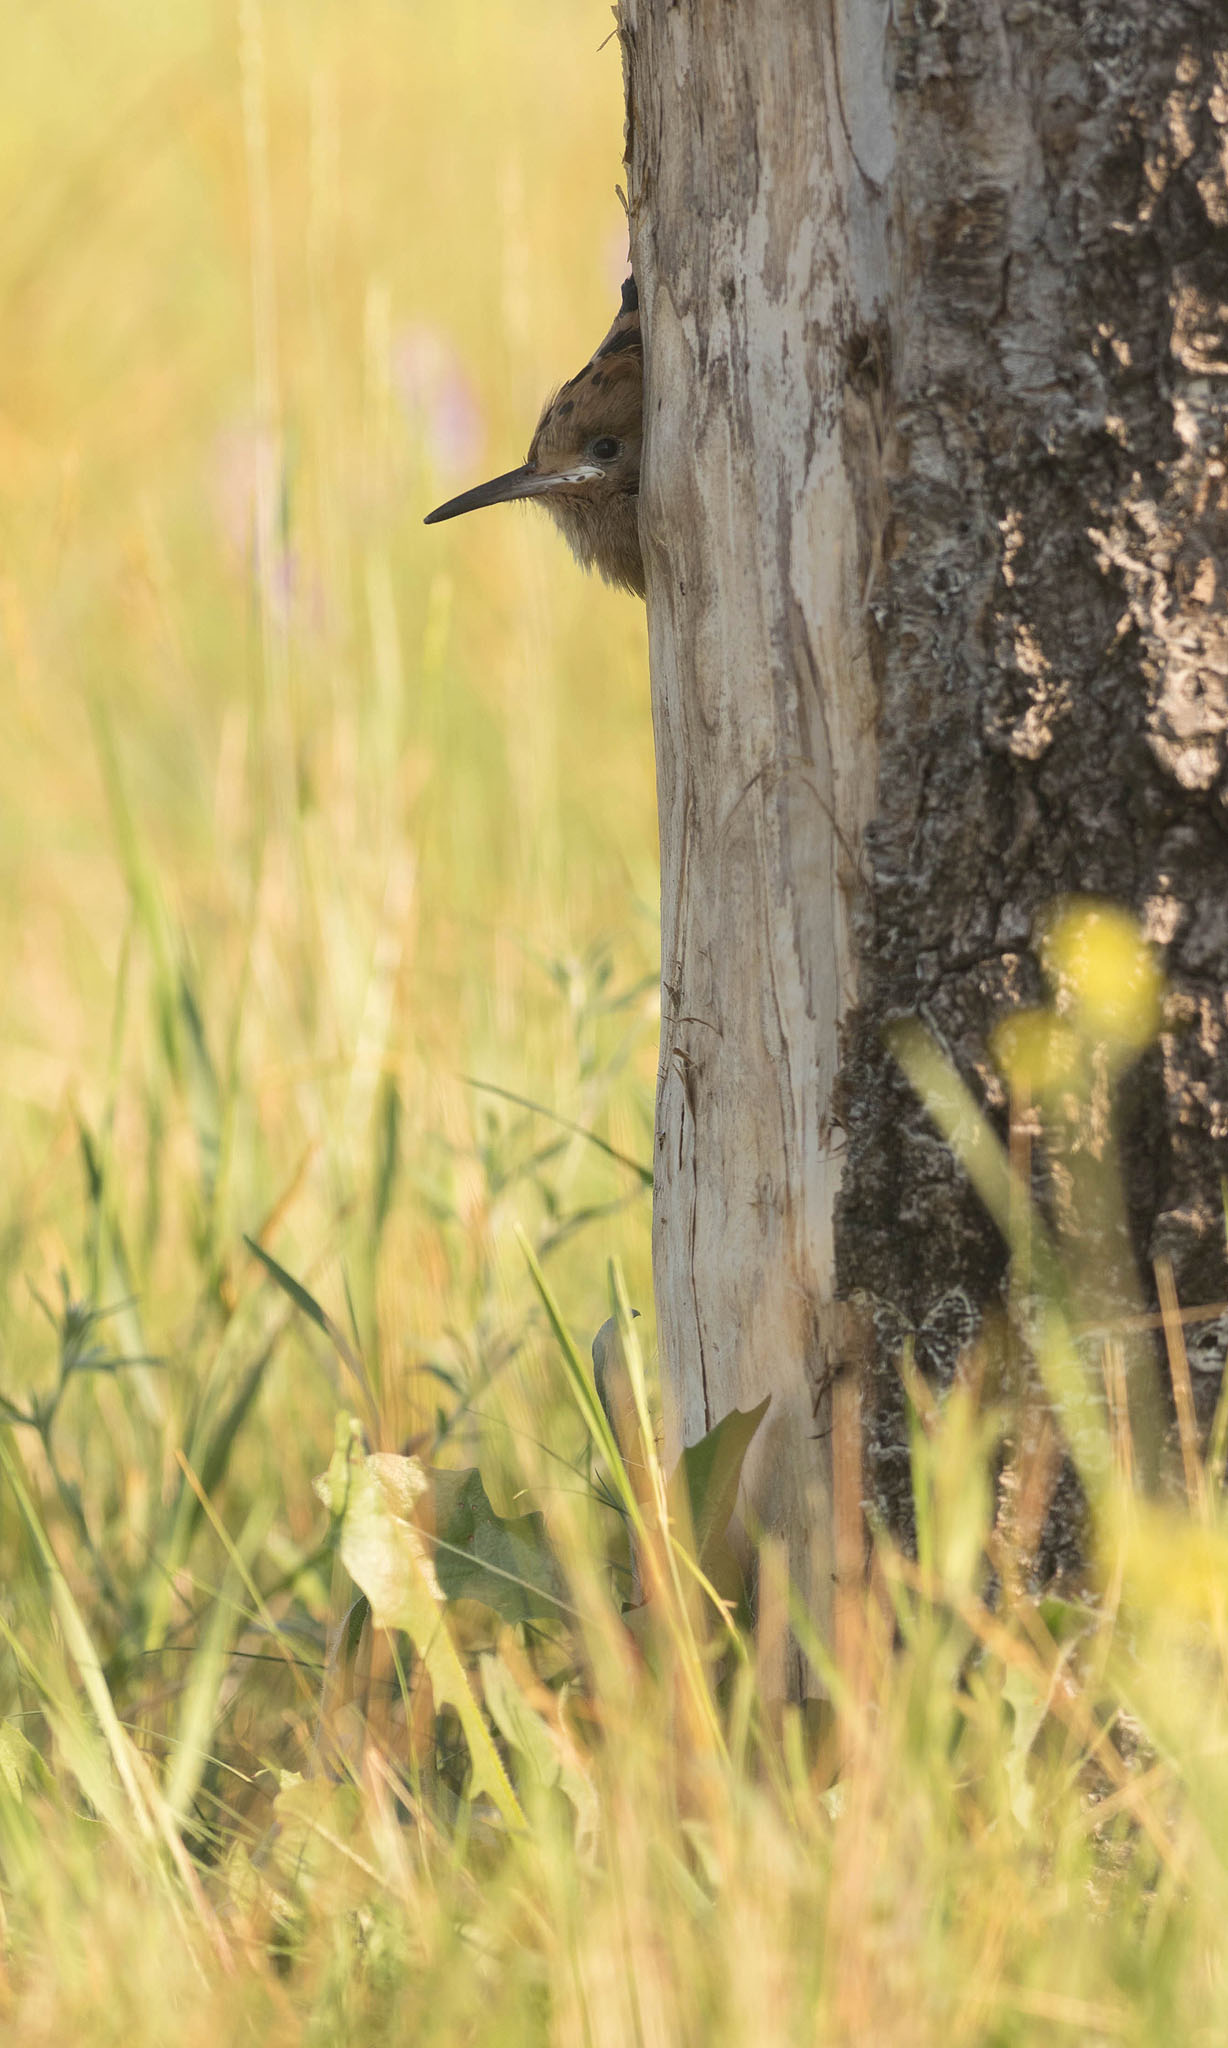
The next morning we had our first photo session – a beautiful setting for Hoopoe. Both parents were bringing food back to the chicks – my clients worked largely on capturing flight shots whilst I concentrated on video. We also got images of the youngsters peeking out of the nest hole! This hide is one-way glass, situated at ground level, with a wild flower meadow as the backdrop. It also doubles up as a White Tailed Eagle hide in the winter months.

hoopoe perched with food for chick in a flower meadow in serbia

hoopoe chick peering out of nest hole in a tree in serbia

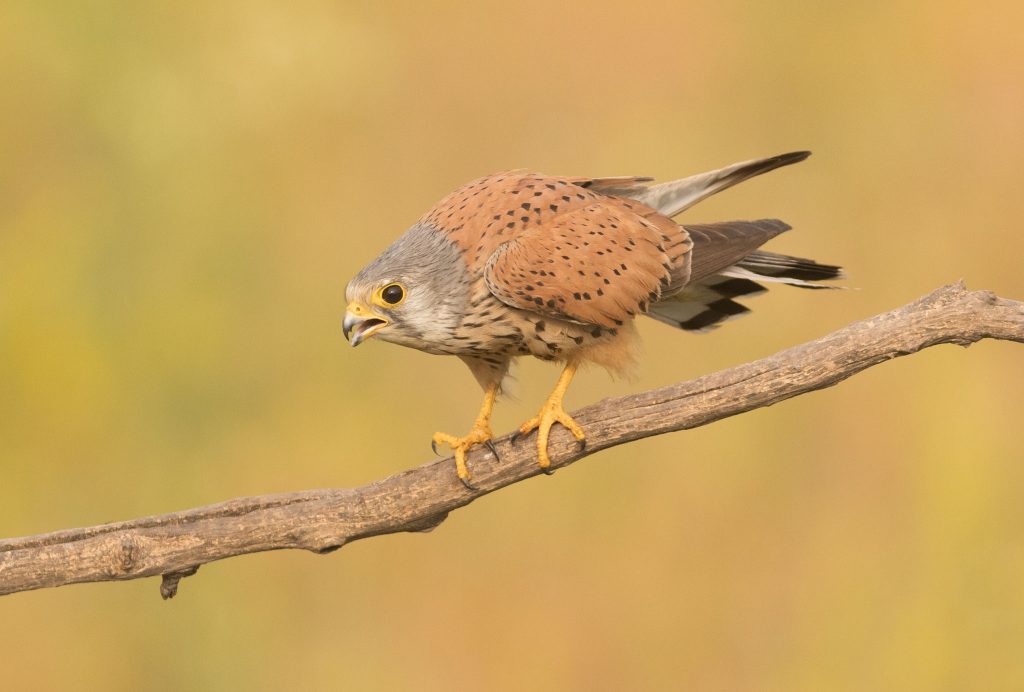
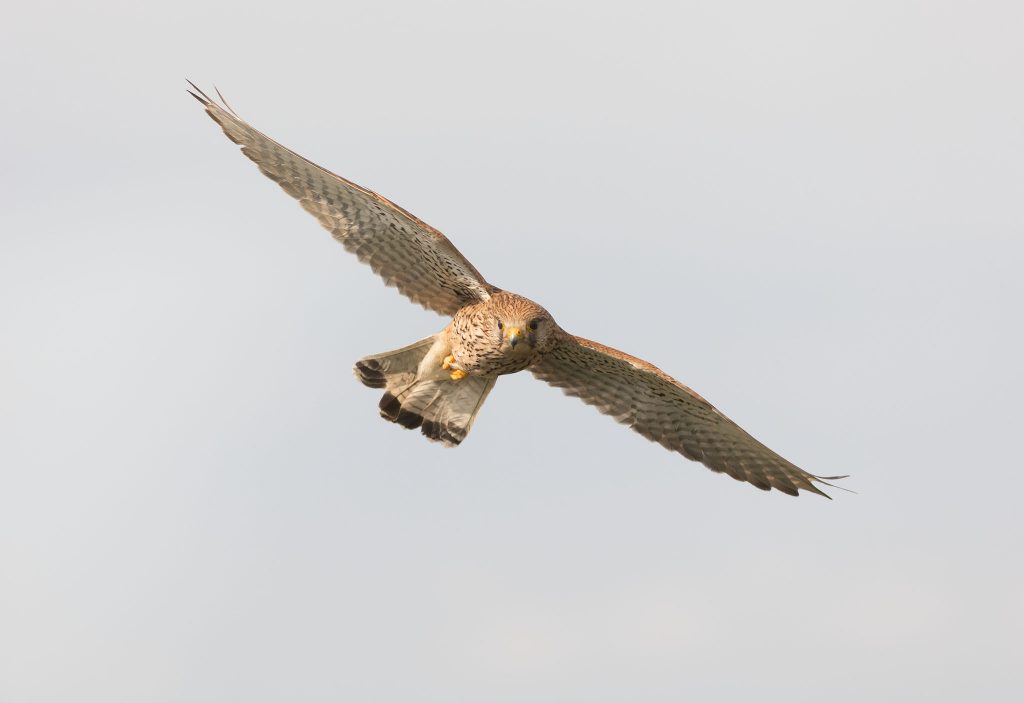
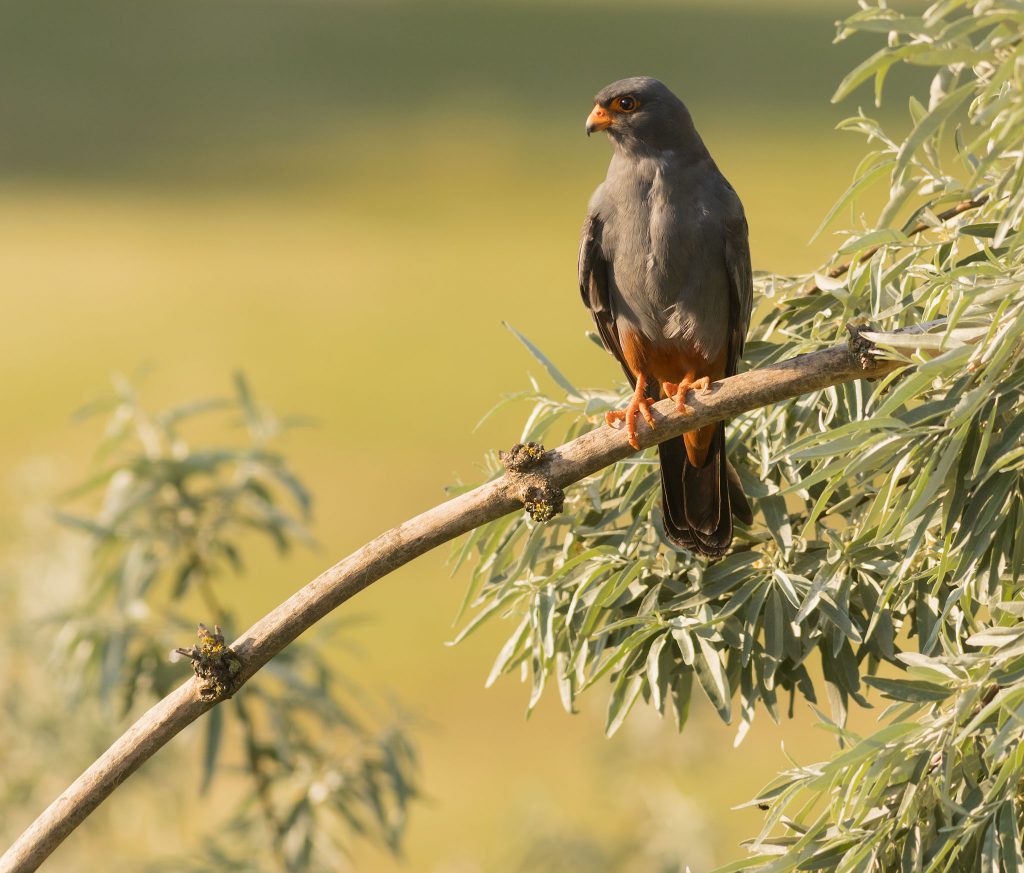
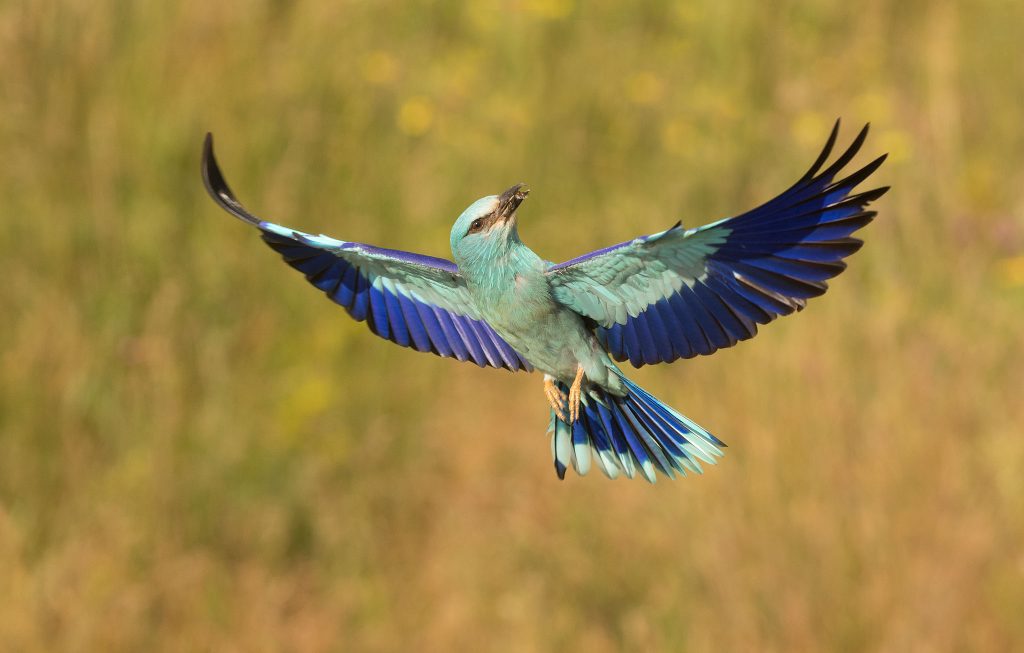
The Tower Hide is always a busy place for photography. Here Red footed Falcon, Common Kestrel and European Roller all nest in close proximity. At times the action can be a little crazy – with so much going on that you don’t know where to point your camera! It often pays to concentrate on a specific species, or focus on a pre-visualised image. I’ve always struggled with flight shots here in the past; this time I managed my best flight shots of both Kestrel and Roller. The Red footed Falcons are always a challenge – their speed can be incredible!

male common kestrel calling on a perch in serbia

female common kestrel in flight in serbia

male red footed falcon perched in a tree in serbia in evening light

I tried a suggestion from one my clients, Ray, switching to a larger rectangular box for my autofocus. I was amazed how well it worked and I captured one of my best ever flight shots of a Roller as it swooped up to its perch. The Canon R6 auto-focus had locked on incredibly well and from 6 images, 4 were pin sharp on the head. Happy days!  Everyone enjoyed the Tower Hide very much and we did another session later in the week.

european roller in flight with food in serbia

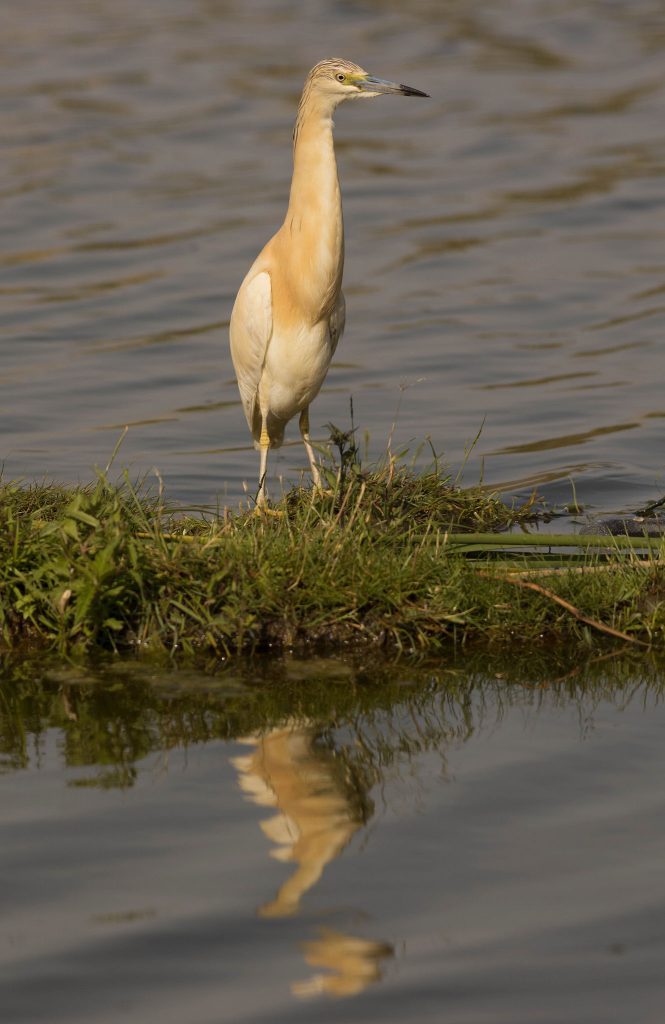
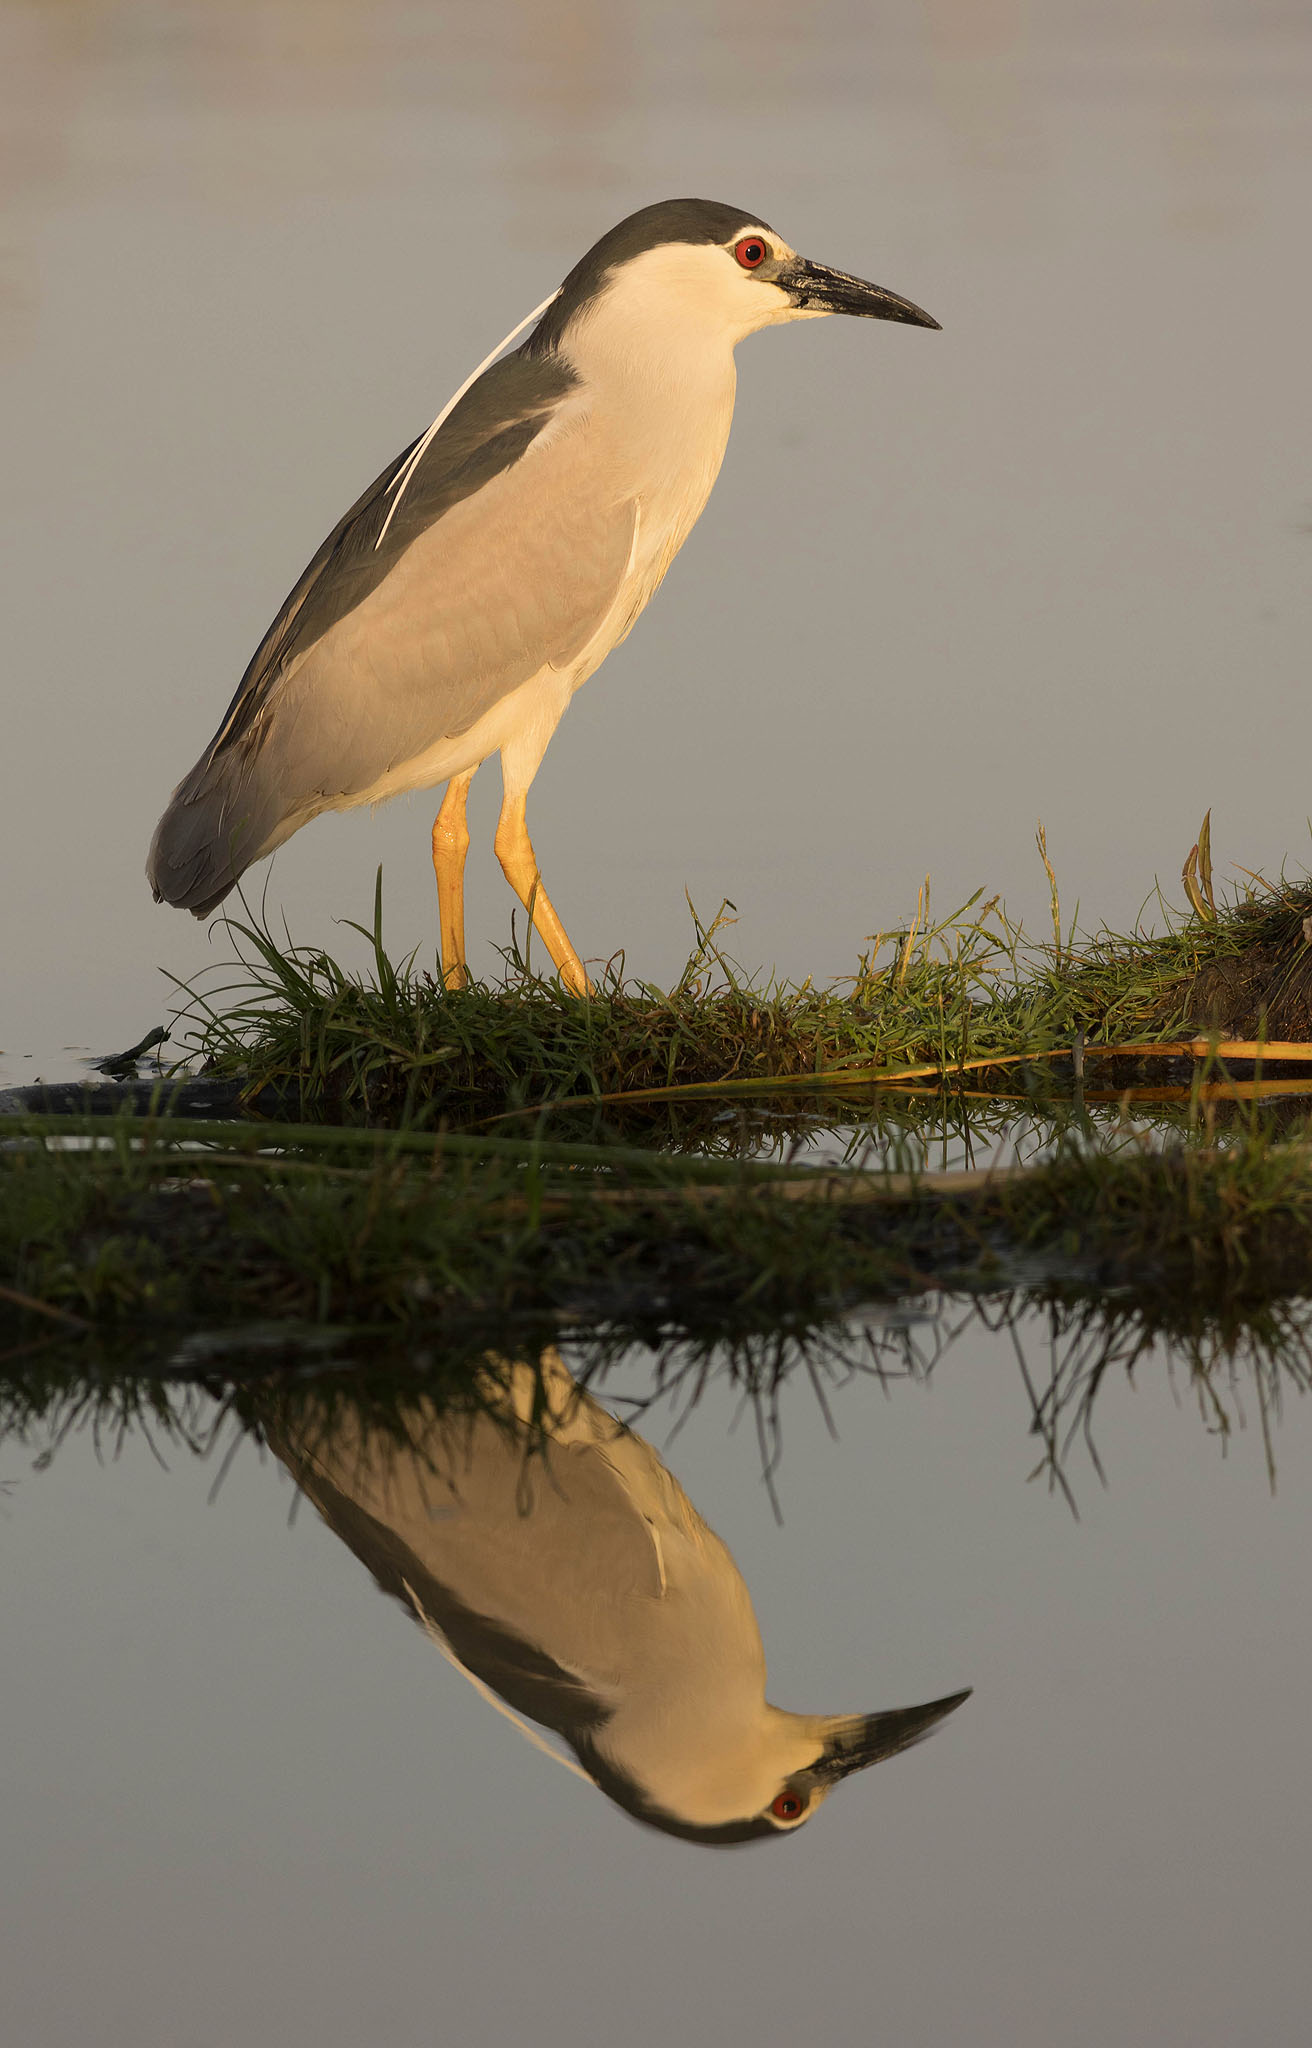
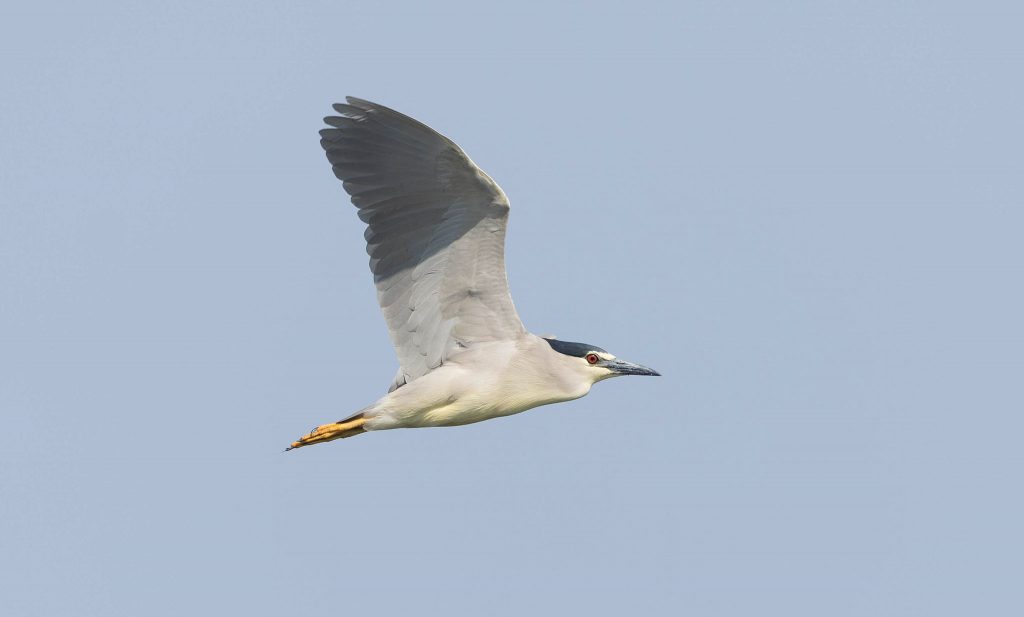
The Water Hides are some of my favourites in Serbia. There are currently 2 in action, whilst a third one is being built for 2024. The main Water Hide is situated amongst the reed-beds with a beautiful view across the water. The background colours are beautiful and with low winds the reflections are very appealing. From our sessions here we photographed Grey Heron, Night Heron, Squacco Heron, Purple Heron, Little and Great Egret. The light here can be stunning – early in the morning the sun starts to break over the reeds and the quality of both sunlight and reflections is spot on.

squacco heron on lake in serbia
black crowned night heron with reflection on water in serbia in morning light


purple heron in flight in serbia

grey heron coming into land in reed beds in serbia

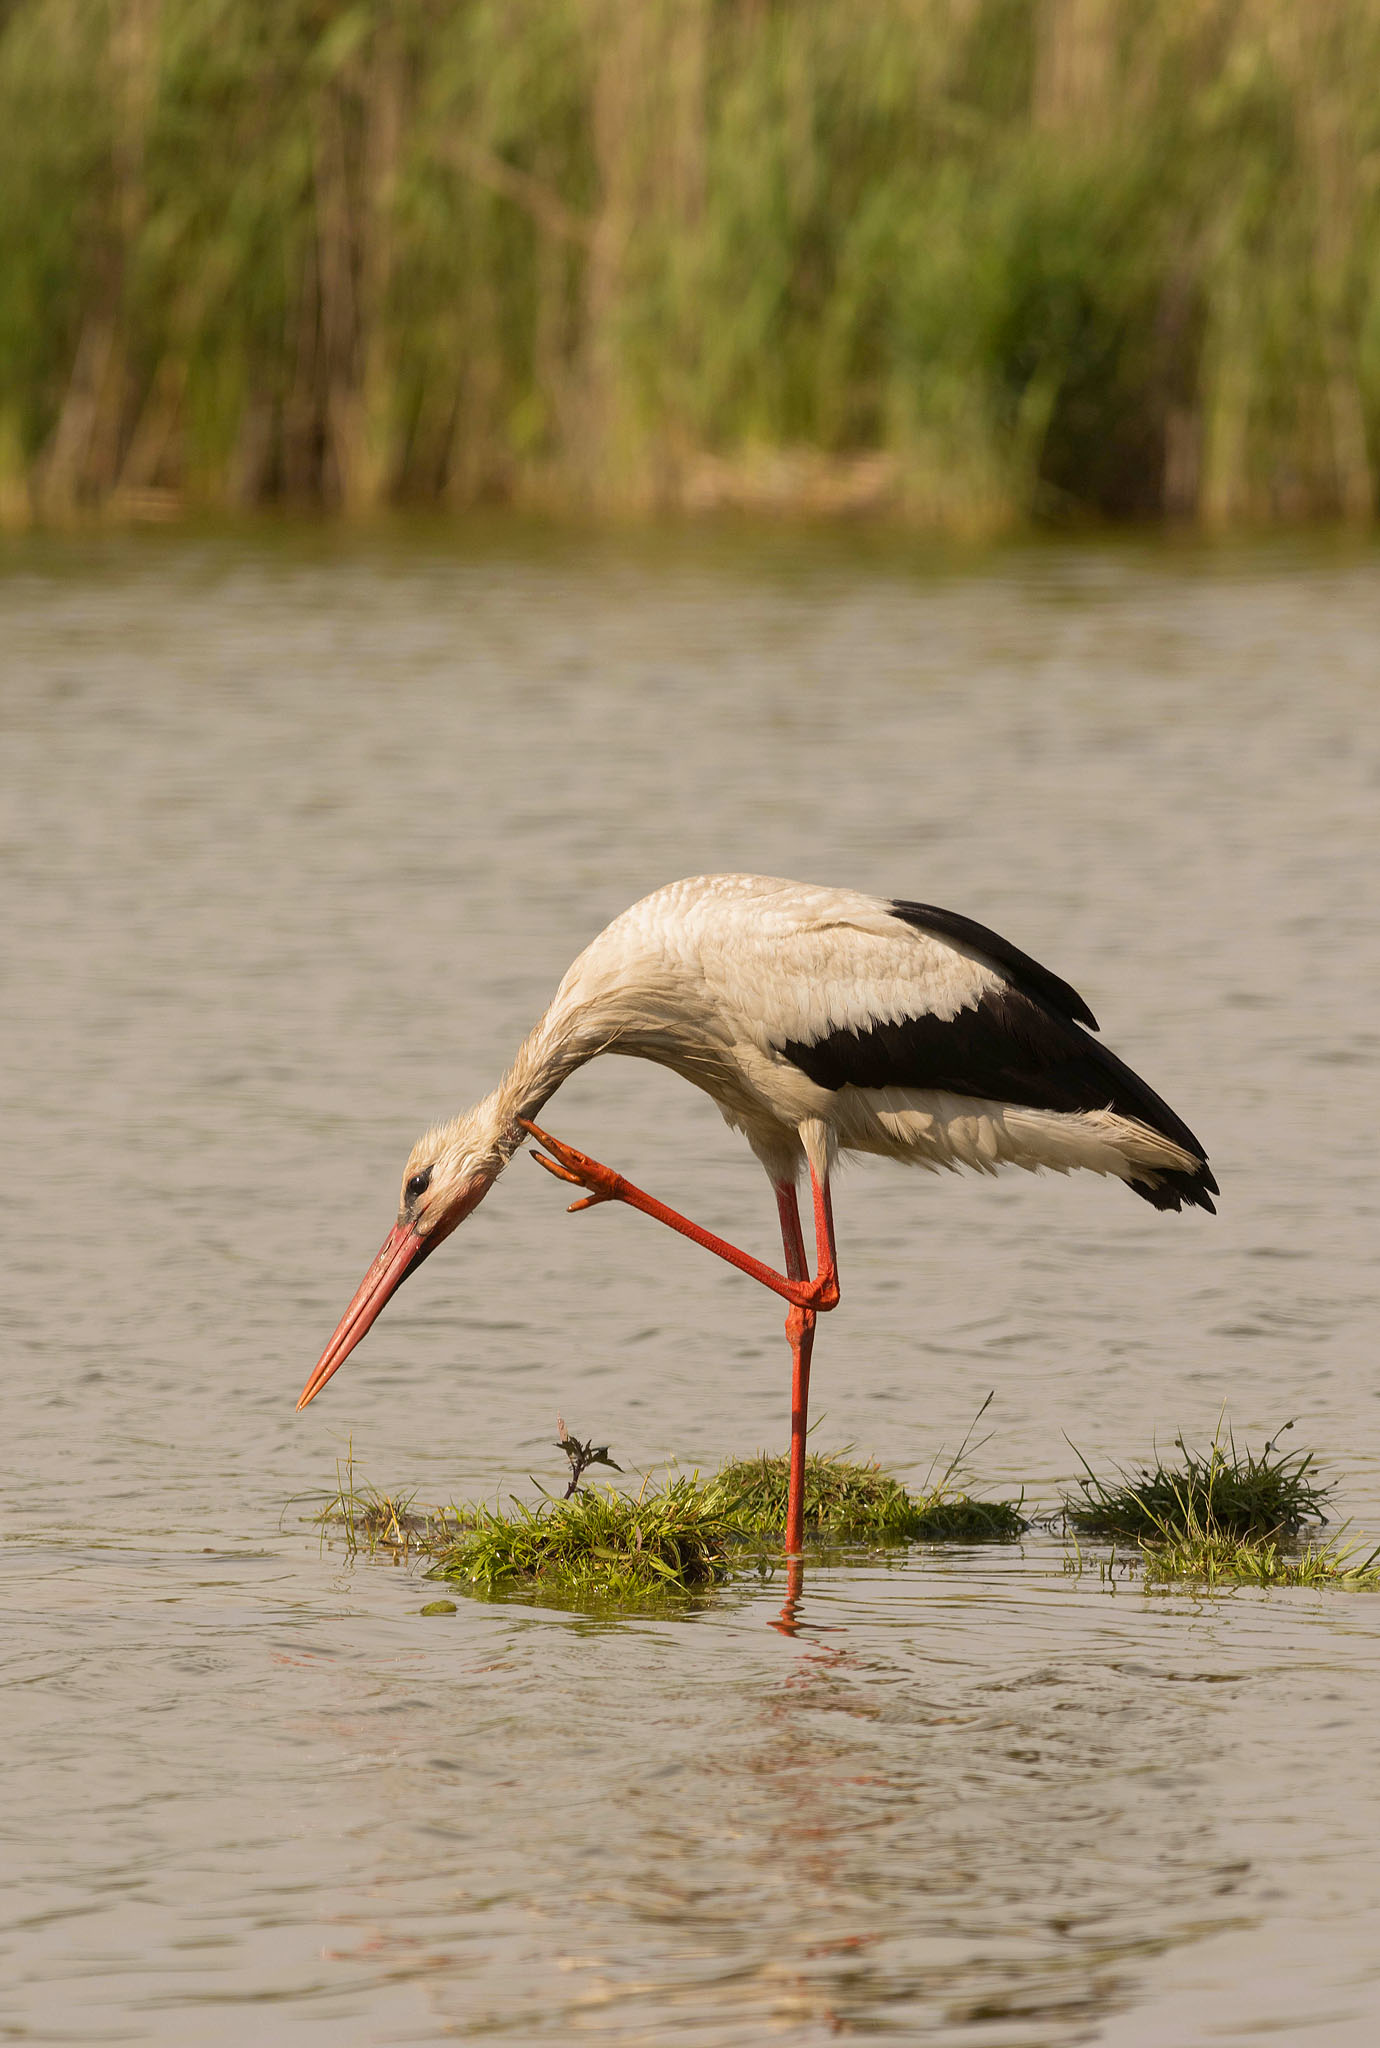
In our last session at the hide we had quite a surprise. Out of nowhere a White Stork landed, right in front of us and began to fish. We all took many, many images as the bird danced around, striking numerous poses and catching its prey. This was an absolute delight and something I had never seen from this hide before!

white stork stood in water on one leg scratching head in serbia

white stork feeding on fish in water in serbia


Join the Waiting List for my Serbia Tours 

Email: paul@naturephotographycourses.co.uk


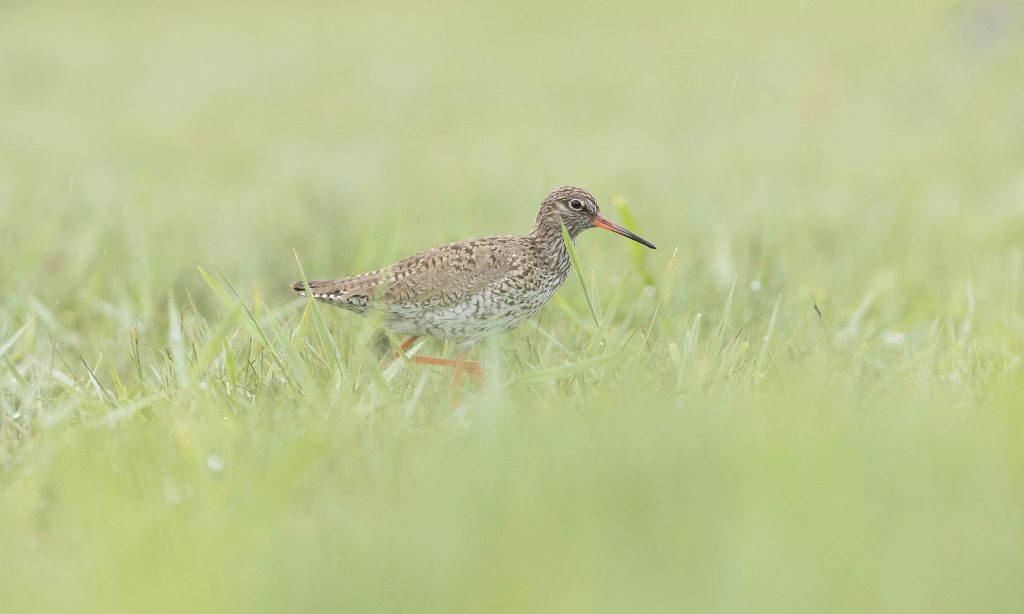
The second water hide is a low down affair. Lying in a 4 foot high tube for hours on end is never comfortable… but I really like the aspect of this hide. Completely at ground level we had close up views of a range of birds that were naturally foraging in the shallow waters. Lapwing, Redshank, Great Egret and Purple Heron all came reasonably close for photography. It pays to keep turning over now and again (a bit like a spit-roast) to relieve tension in both your neck and back. Still, it might help to incorporate a little pilates into your life for moments like these…

redshank walking low down in grass in serbia

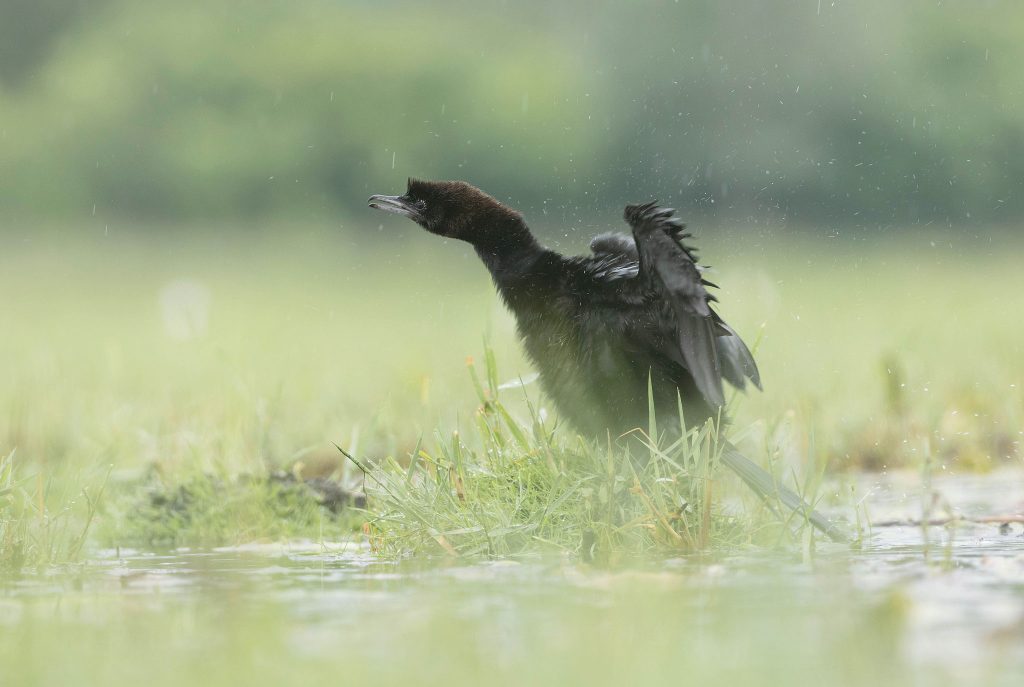
Some of my favourite images from this session were of a Pygmy Cormorant. The light was always flat and at times there was a little rain in the air. It was nice to get something different, a little atmospheric – the bird even did a nice shake for me at one point!

pygmy cormorant shaking off water in rain in serbia

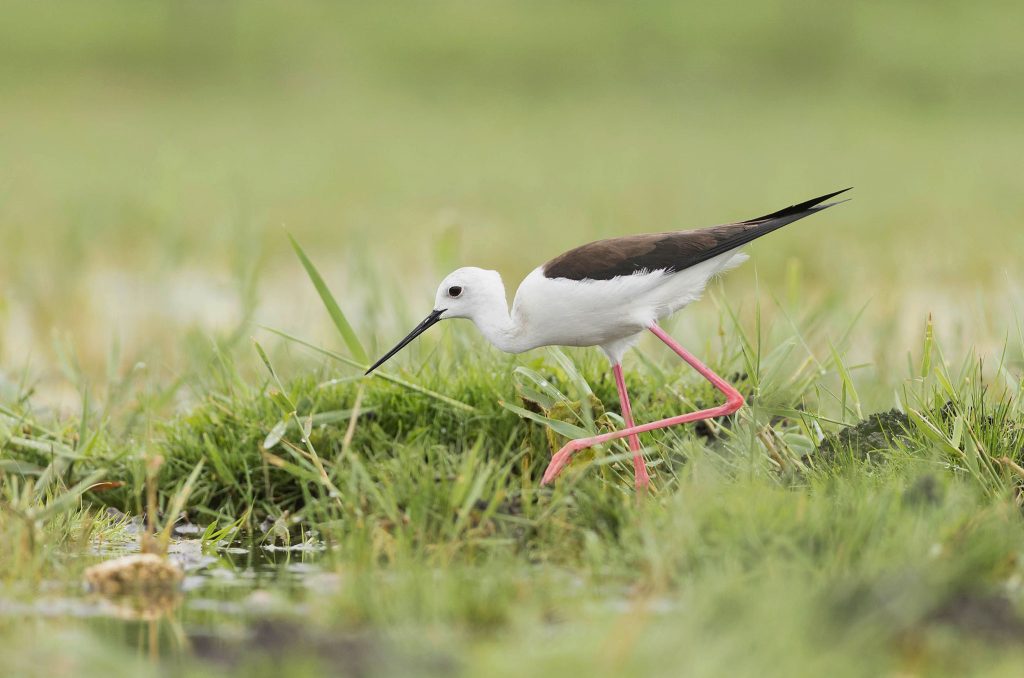
There’s one bird I’d always wanted to capture in the past but never been successful – the Black winged Stilt. I think these birds are beautiful. Dainty and elegant.. although they can look a little too ridiculous at times when you realise just how long their legs are. As I’d hoped, a few of these birds slowly wandered in our direction and we managed some pleasing shots, often with blurred foregrounds.black winged stilt feeding in shallow water in serbia

black winged stilt feeding in shallow water in serbia

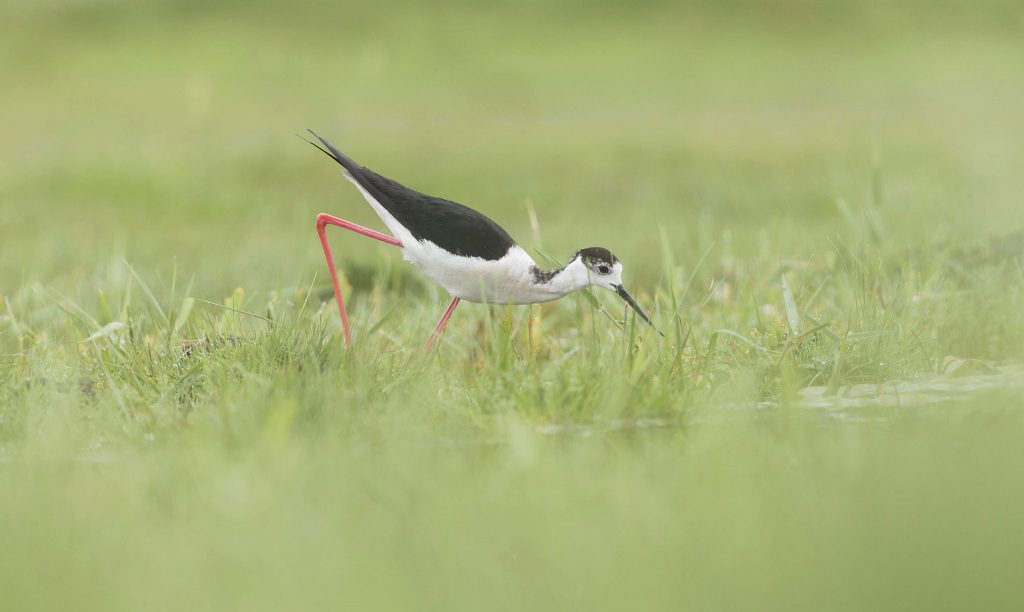
We did a solid 4 hours in that hide and, despite the discomfort, I really enjoyed my time in the there. And there’s always a sense of achievement at the end!

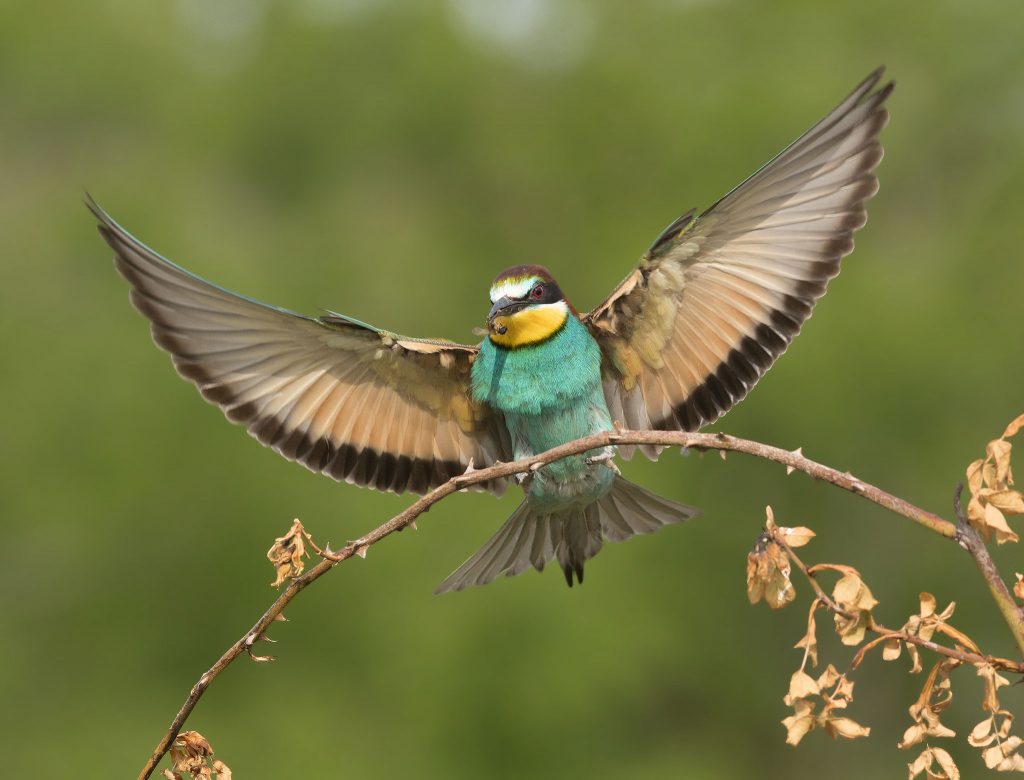
This year conditions for the Bee-eaters were fabulous. Shooting in the afternoon can give incredible light, particularly as the sun begins to set behind us. We shoot from a pop-up hide, which the birds readily accept. The bubbling sound here is just incredible, something that can’t be conveyed in the images – but you can listen to it in my Serbian Photo Tour Video

european bee-eater calling on perch in evening light in serbia

european bee eater food pass on branch in serbia

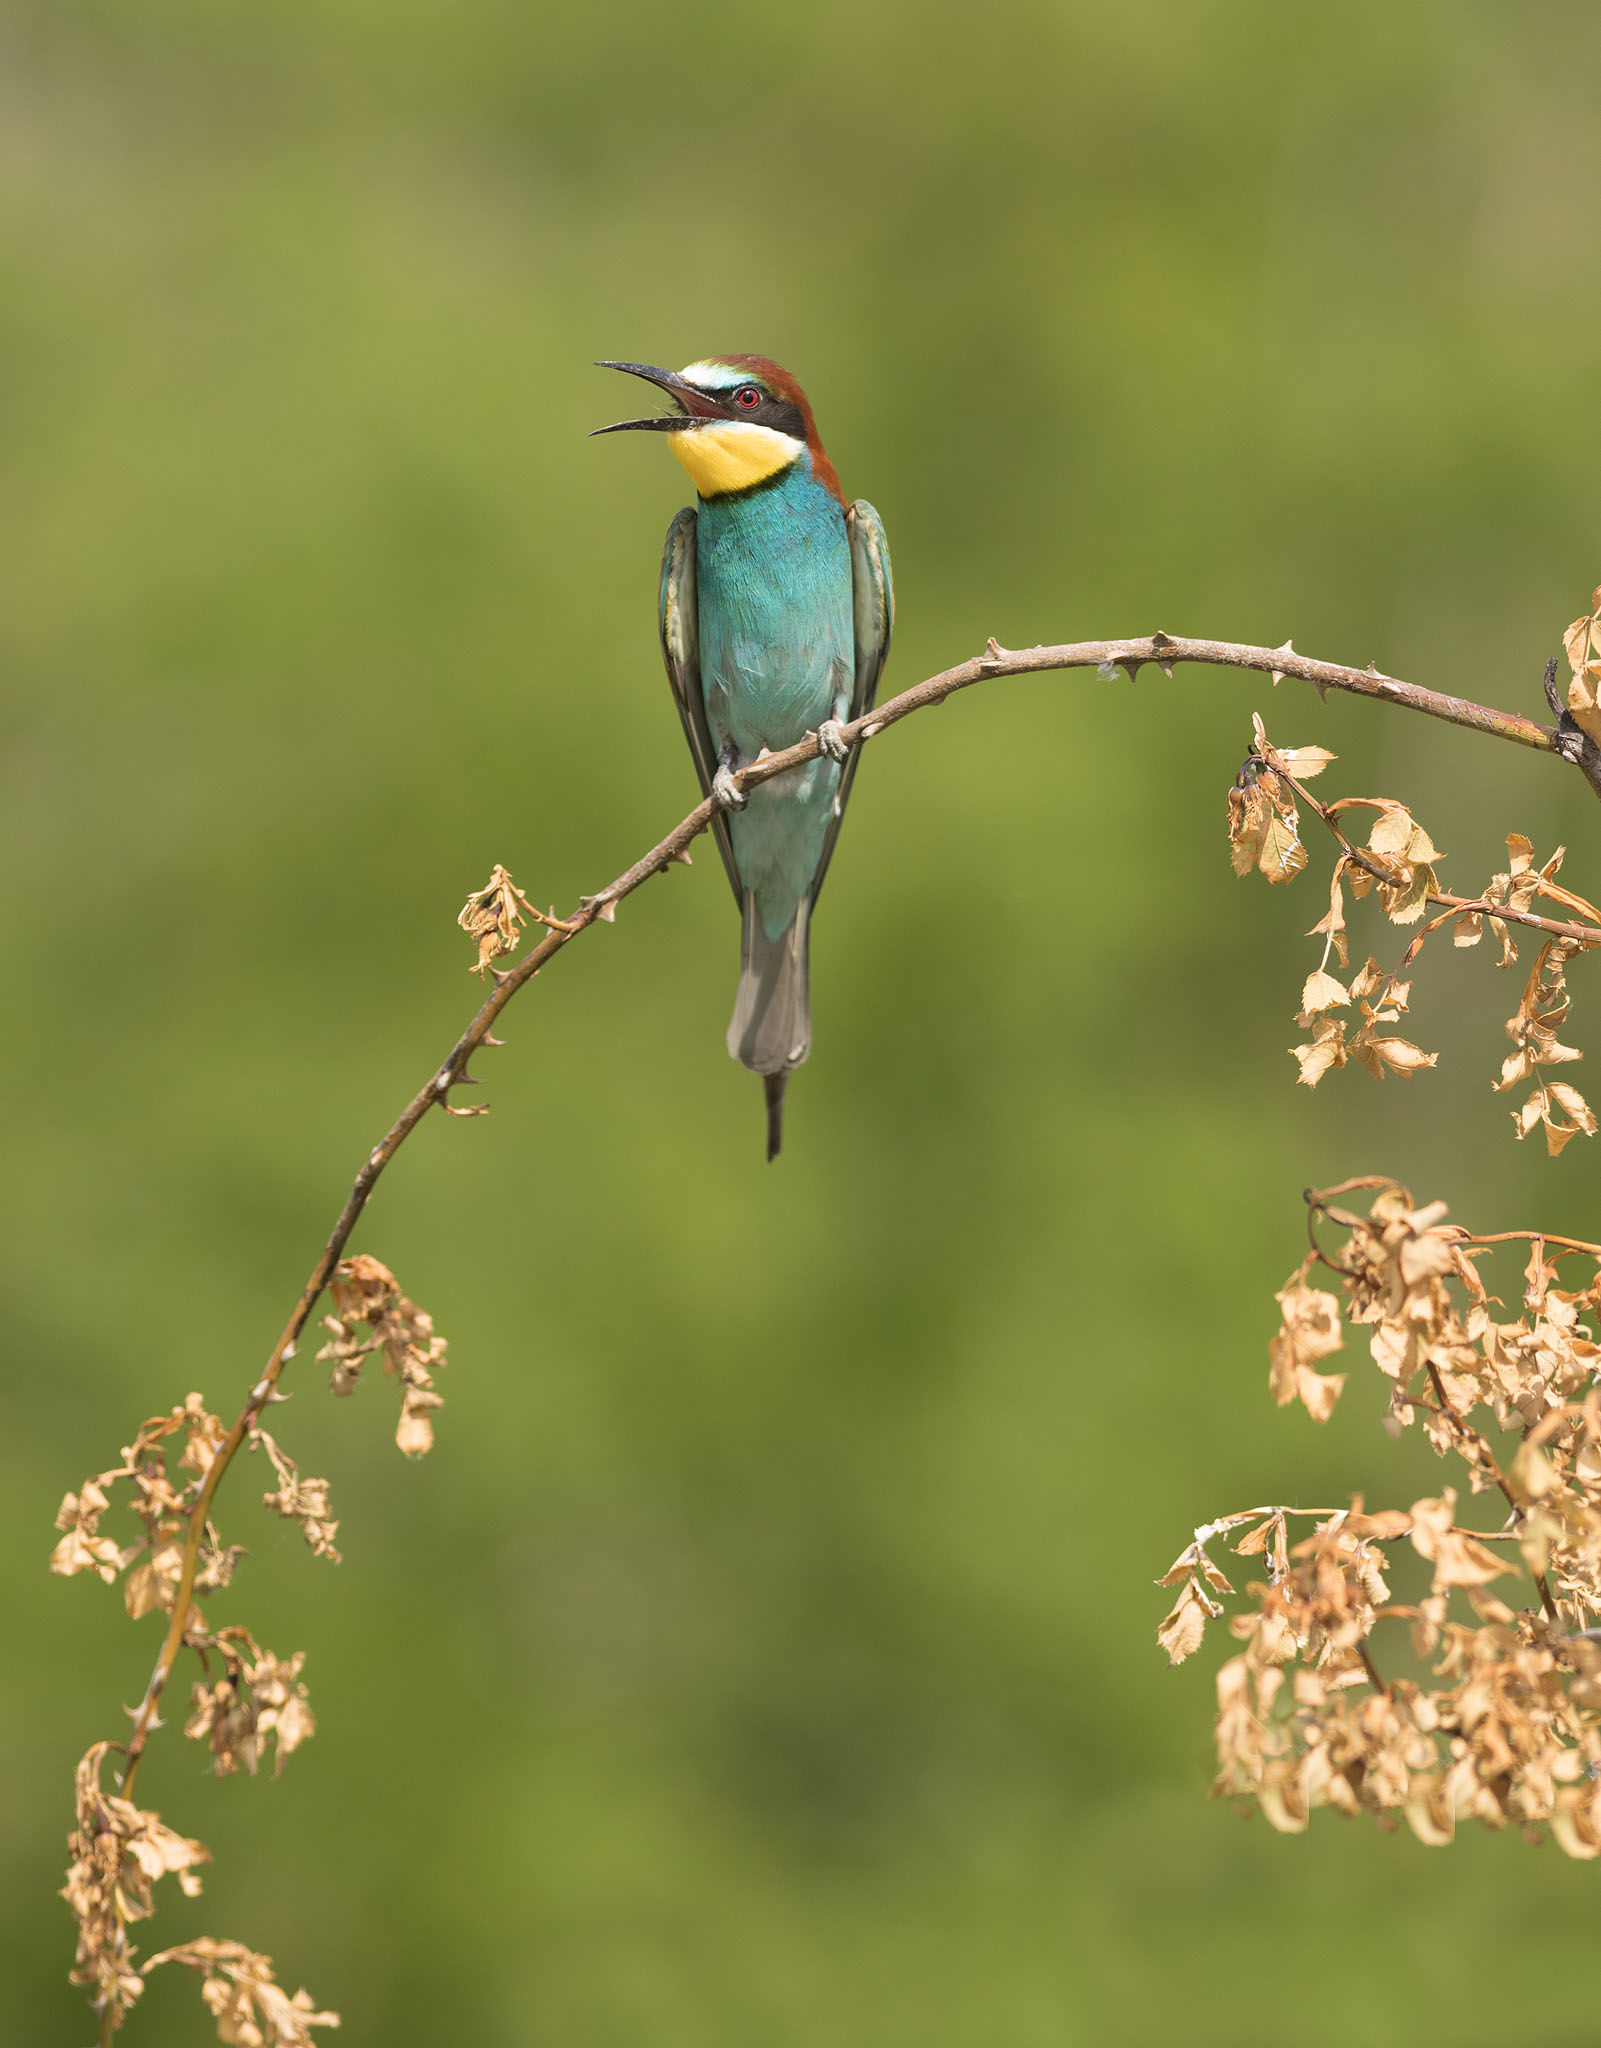
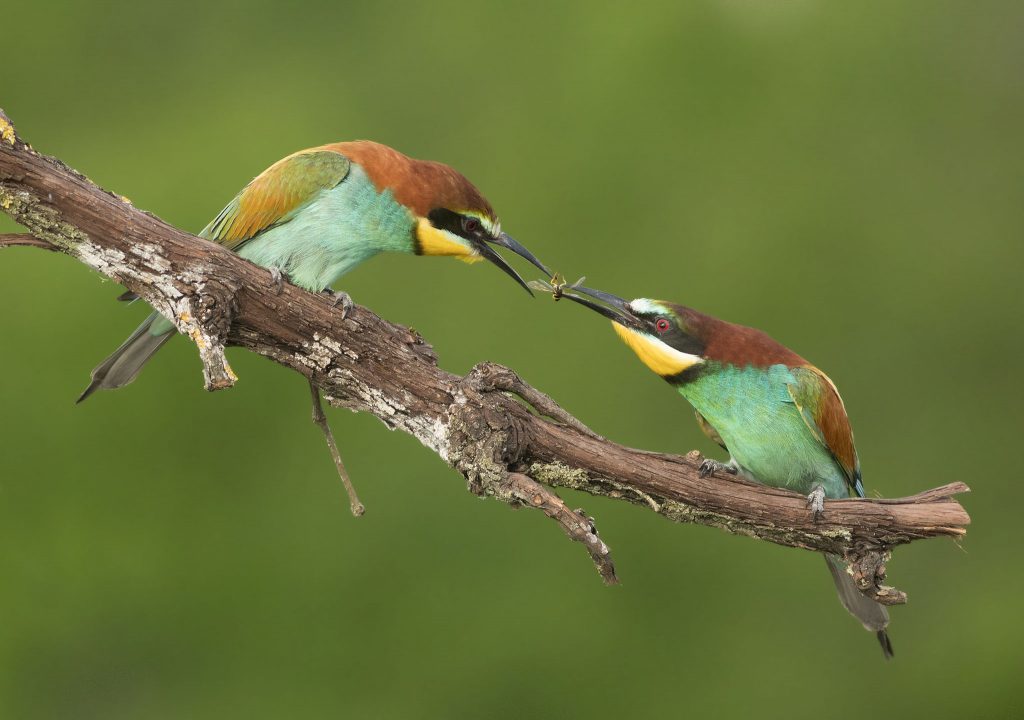
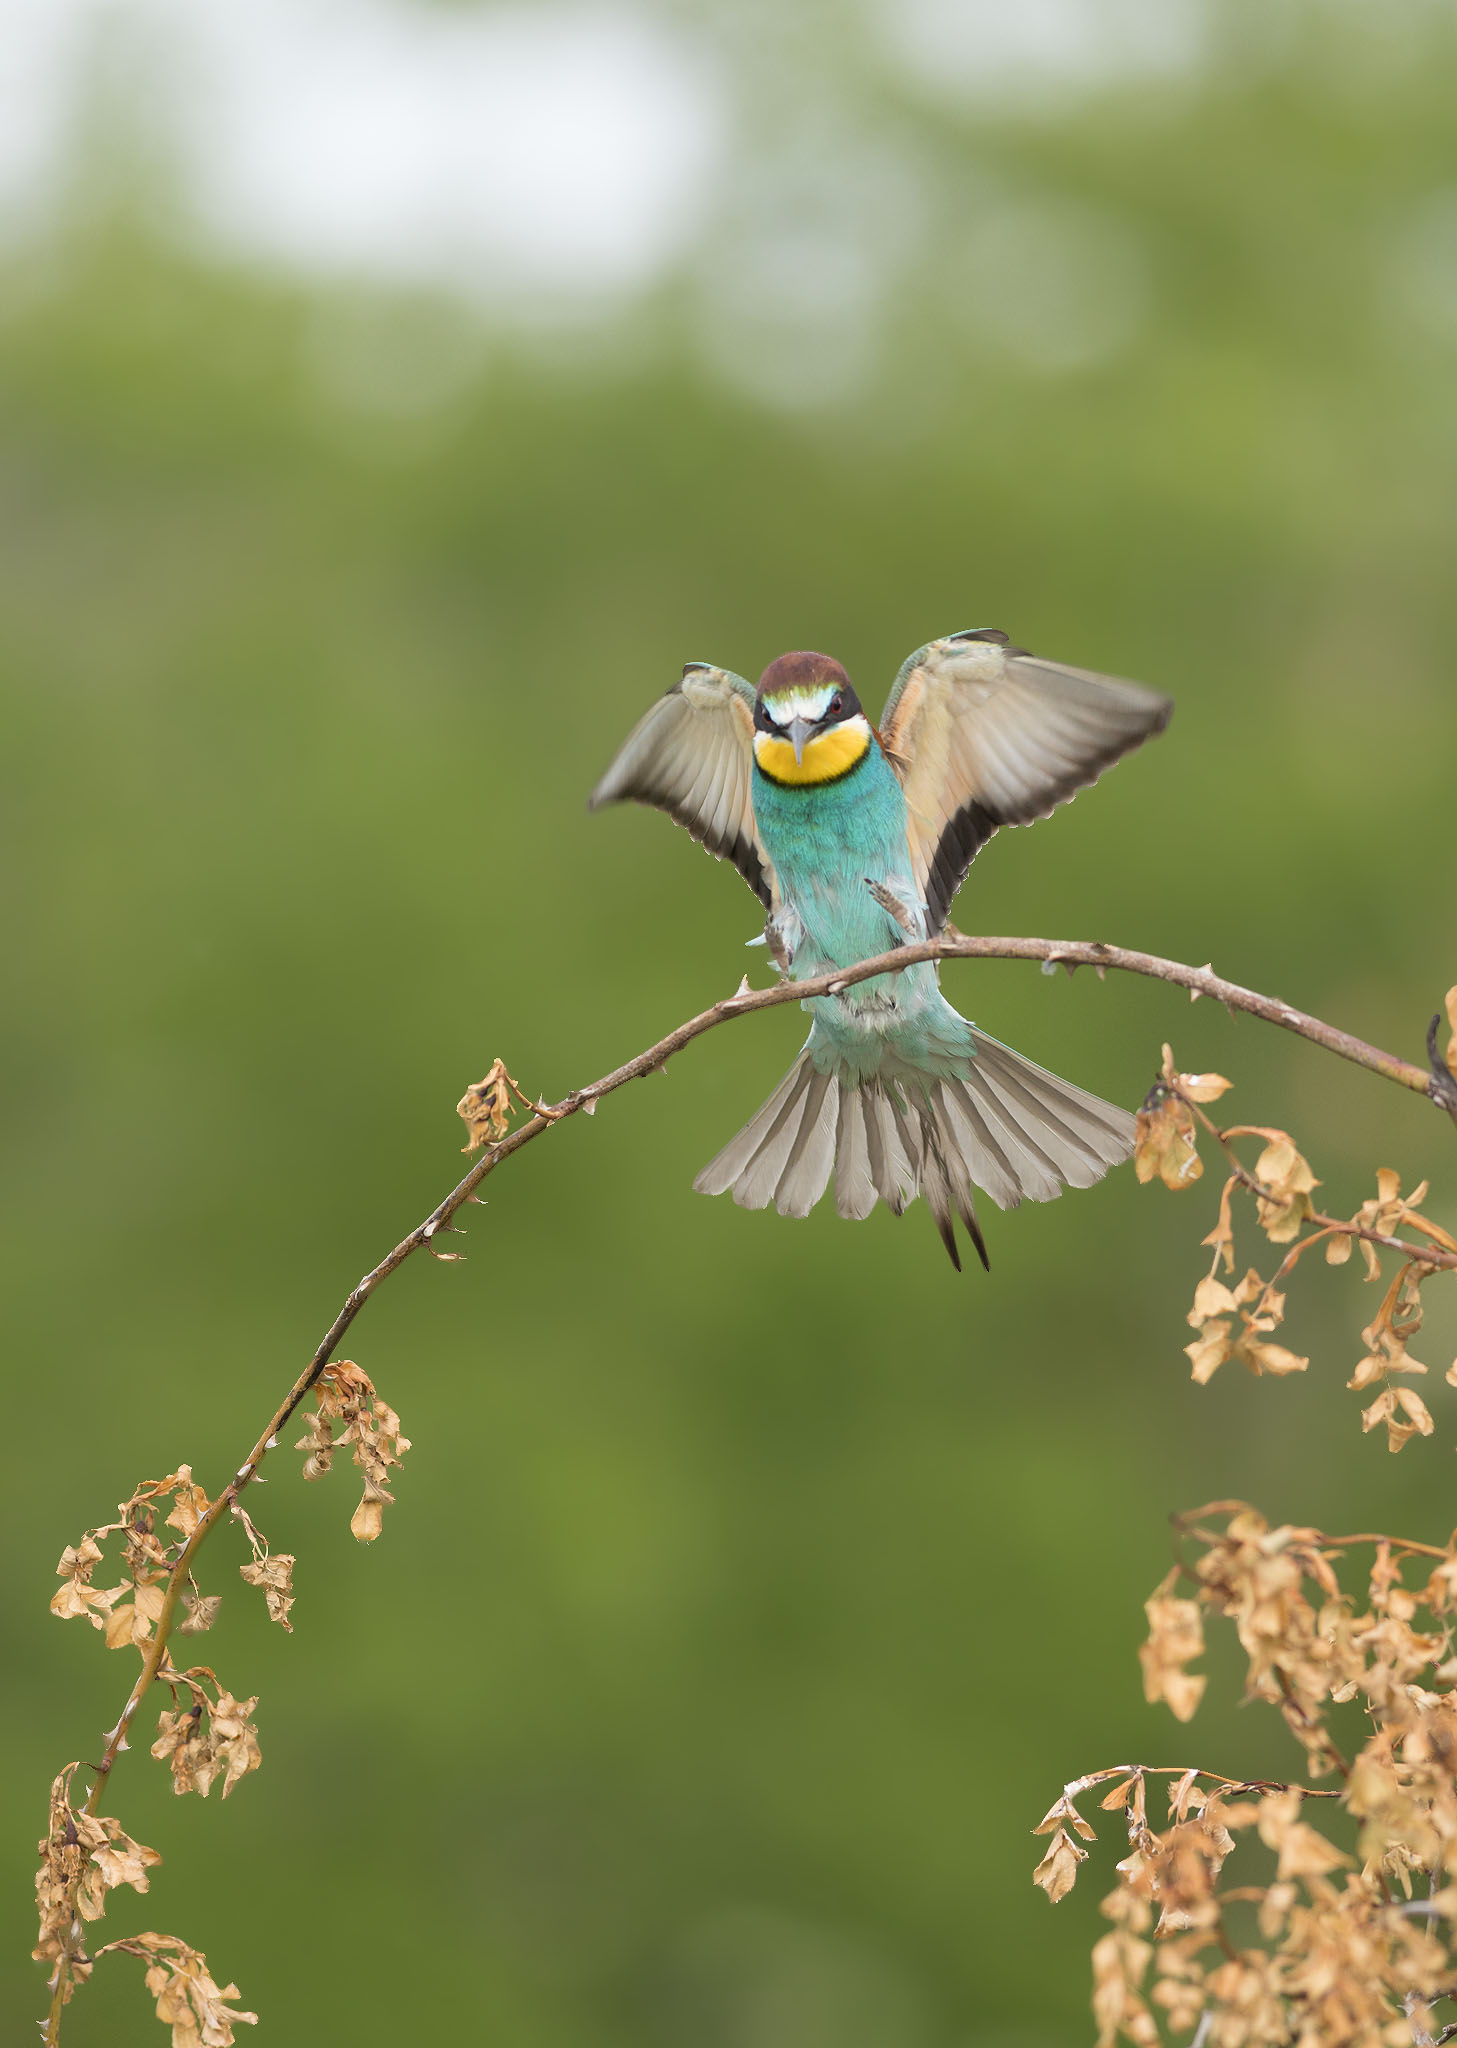
Simple portraits aren’t difficult to capture and even the food pass is relatively easy. So, with such great light, and favourable winds, I set about capturing some decent landing shots as birds came to alight on the perches. It’s often trial and error, but after a few attempts I managed some images I was really happy with.

european bee-eater coming into land on branch in serbia

european bee-eater coming into land with wings outstretched on branch in serbia

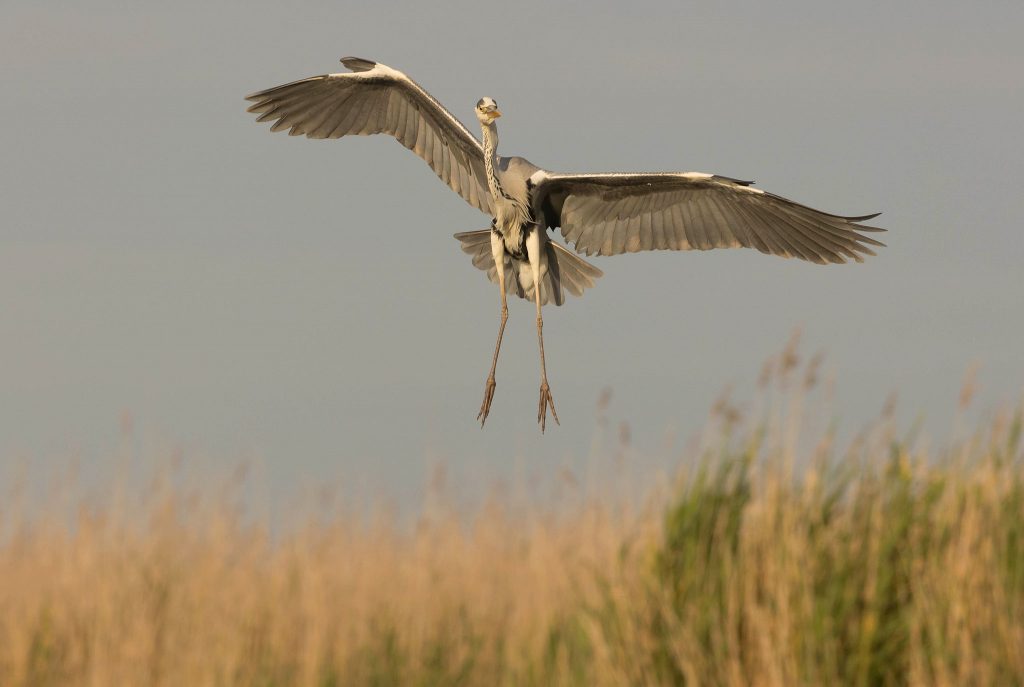
Without doubt, one of the highlights for me was our new location for Birds in Flight Photography. This site allows us to shoot at eye level and with such good activity we had numerous attempts at our flight shots. In just a short space of time we had photographed 4 species of Heron, 2 species of Egret and 2 species of Cormorant, not to mention the many Gulls – all from the same place!

night heron in flight with blue sky in serbia

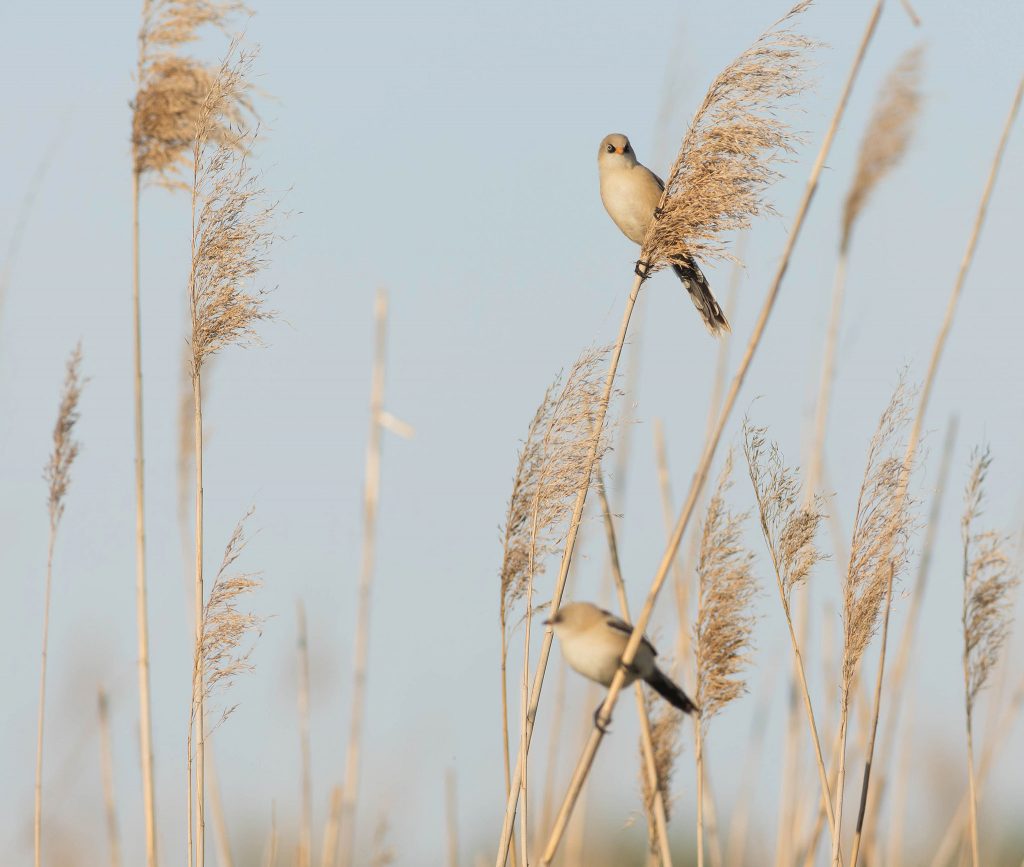
Over the week we photographed at a second Hoopoe Hide, a Penduline Tit nest, and enjoyed ‘in the field’ photography with the help of our knowledgeable Serbian guides. We photographed Spoonbill, Great Reed Warbler, Moustached Warbler, a family of Bearded Tits and numerous Marsh Harriers! We had sightings of Red backed Shrike, Saker Falcon and Little Bittern. The species we saw reached impressive numbers – we counted around 50.. just in one morning! We finished our tour with a morning trip to Subotica, with a local guide, for a little sight-seeing and to learn about the history of the town.

two bearded tits perched in reeds in serbia in summer

It was a great week with some truly memorable moments. As always a big thank you must go the hide operators who work extremely hard. And a massive thanks to my clients for making it such a fun trip, great company to have!

Watch my video of this years’ Serbian Bird Photography Tour on YouTube


Join me on a Tour in Serbia (Places are limited)

Email me: paul@naturephotographycourses.co.uk


Photograph the Famous Roosting Long Eared Owls of Serbia


For Wildlife Photography Tours in Serbia & Bulgaria  make sure to Join My Mailing List  


Full Bird List for this Tour

I’ve done my very best to list everything we saw and heard, but there were so many species I may have missed something!

Farmland / grasslands: Red footed Falcon, Common Kestrel, European Roller, Jackdaw, Collared Dove, Common Starling, Magpie, Carrion Crow, Hooded Crow, European Bee-eater, Common Cuckoo, Saker Falcon, Hobby, Stonechat, Turtle Dove, Golden Oriole, Woodpigeon, Corn Bunting

Water Birds: Grey Heron, Black-crowned Night Heron, Squacco Heron, Purple Heron, Great Cormorant, Pygmy Cormorant, Great Egret, Little Egret, Little Bittern, Spoonbill, Black winged Stilt, Mute Swan, Coot, Mallard, Pochard, Red crested Pochard, Ferruginous Duck, Tufted Duck, Greylag Goose, Redshank, Northern Lapwing, Marsh Harrier, Black headed Gull,  Mediterranean Gull, Black Tern, Whiskered Tern, Kingfisher

Reed beds / Wetlands: Bearded Tit, Sedge Warbler, Reed Warbler, Great reed Warbler, Moustached Warbler, Penduline Tit, Sand Martin

Woodland and Scrub: Whitethroat, Red backed Shrike, Lesser grey Shrike, Long eared owl, Little Owl, Great spotted Woodpecker, Syrian Woodpecker, Green Woodpecker, Jay, Great Tit, Chaffinch, Blackcap, Whitethroat

Other Wildlife: Otter, Roe Deer, Brown Hare, Water Snake, Frogs, Lizards, Butterflies, Damselflies & Dragonflies

Share

How to Photograph Birds in Flight: Advanced Photography

How to Photograph Birds in Flight: Advanced Photography

My latest YouTube video is an advanced photography tutorial on photographing birds in flight. I discuss how to set up your auto-focus for flight photography and how to use the AF case settings. Whilst aimed more at Canon users it’s also useful for photographers with other equipment. Click the image below to watch the video.

You might also be interested in the earlier video I produced How to Photograph Birds in Flight – this is a more general video and suitable for beginners.

Share

Wildlife Photography for Beginners: My 5 Top Tips

wildlife photography for beginners

There’s many ingredients that make a cracking wildlife image. Today I’ve picked out just 5 tips that I think are particularly important if you’re just getting started.

Tip Number 1: Auto-focus Mode

You’re probably using auto-focus already, but it’s important to know which mode you have set in camera. Single shot, also called One Shot or AF-S is ideal for static subjects; with this mode, once the camera has focused on the subject the focus is locked. It’s particularly useful for re-composing without the focus changing. The Continuous Auto-focus mode, also called Servo and AF-C will continuously re-focus as a subject moves, provided you keep focus engaged. This is the best option for moving subjects, e.g. birds in flight and running animals. Make sure you understand the difference between the two and that you always know which one is set in camera. You can also use the Back Button Focus method, in which case you can keep the camera permanently on the Continuous Focusing mode.

Tip Number 2: Focus Points and Zones

Your camera might be set up so that all the focus points (the whole viewfinder) is focusing. This is not ideal! You will have a number of focus points in the viewfinder – these are the squares that will light up red when activated. I’d advise using using one focus point or a small cluster. Depending on your camera you should be able to select different focus points depending on where you want to focus. More advanced cameras will allow greater options of clusters and zones and you should experiment to see what works in different situations. Watch my video on Flight Photography for more detail.

Tip Number 3: Aperture Priority

I always advise Aperture Priority for beginners. This exposure mode is a good choice for wildlife photography, also known as A or AV. You set the aperture, ideally a fairly wide aperture, e.g. f5.6; the camera will then select the appropriate shutter speed dependent on the available light and the ISO. Because you are using a wide aperture and letting more light in, this means that the shutter speed will be higher to balance it. The other benefit of selecting a wide aperture yourself is that it will help blur the background and make the subject stand out more clearly. ISO is also a factor here, so if you’re not sure about this then try the following as a guide: select between ISO 200 and 400 on bright days and between ISO 800 and 1600 on overcast days..

Tip Number 4: Avoid Underexposure

A common problem is when photographing a subject against the sky – resulting in dark, underexposed images. This is because the light reflecting back through the viewfinder causes the camera to reduce the exposure. To fix this, if you’re using Aperture Priority (or Shutter Priority) you need to find the plus/minus button; press this down and use the dial to increase the exposure, i.e. make it brighter. You need to go in the Plus direction; try around +1 as a guide. Each camera will vary how this works but there is usually a dial on the top, or perhaps a wheel at the back.  If you want to understand more about exposure, watch this Exposure Tutorial Video

Tip Number 5: Continuous Shooting

When photographing birds and animals is advisable to shoot continuously, rather than one shot a time. You’ll increase your chances of a better image. Find the Drive setting and switch to a Continuous Frame Rate; you may have options of L and H which is low and high; this will vary enormously from camera to camera. It’s not always necessary to shoot at the highest frame rate. I’d suggest starting with a lower rate continuous mode which might be 3 or 5 frames per second. Wildlife is always moving so the more images you take the greater your chance of a pin sharp photo, and/or a particularly pleasing pose.

Tip Number 6: Extra Tip and Most Important!

Please put the welfare of wildlife first! No picture of a bird or animal is more important than its welfare. Try to learn not just about photography but also about the habits of your subject. Use your instinct and back away if you feel you’re disturbing it. Remember, the more time you spend with a wild bird or animal, the more you will learn – and the more it will come to trust you. If you find a great opportunity for regular photographs of popular species such as owls, or rare birds… don’t tell everyone! You can soon find the quiet location literally heaving with photographers, some who may not have the subject’s best interest at heart!

I hope these 5 tips helped you out if you’re just getting started in Nature Photography. Subscribe to my YouTube Channel for future Tutorial Videos. Happy Shooting!

Share

Long Lens Photography Technique

paul miguel youtube

For a long time I didn’t own a ‘big lens’ for my bird photography. I made do with shorter lenses and extenders. Finally the day came when I received my Canon 500mm f4 Mark i lens. I’m still using it to this day, but I’ve learnt a few tips along the way which help me get the most out of it.

Having serious pulling power is great when it comes to wildlife photography, but it can all count for nothing if you don’t use your lens effectively. Big lenses, by which I would consider anything from 400mm and greater, tend to be heavy pieces of kit and need a certain level of technique to manage them effectively.

Hand-holding

You may not want to hand-hold, certainly not for extended periods of time, but there are situations where this is preferable. For birds in flight, I much prefer to hand-hold as I just feel more comfortable with my freedom and range of movement. To hand-hold with a big lens try to hold the camera and lens sideways, rather than point it in front. Place your hand under the lens and keep your elbow close to your body. Most people can only do this for short periods of time – when waiting for action you could keep the lens on the ground by resting it upside down on the lens hood. Alternatively I like to carry a beanbag then rest the camera on here whilst I’m waiting, knowing it’s more protected.

Tripods and Heads

Without doubt the best way to support a long lens is with a tripod. Carbon fibre is a great option as it is strong but relatively light. Not surprisingly, this also makes them expensive. To mount the lens I would advise two options – either a very solid ball head, or a gimbal head. Personally I think the gimbal head is a wonderful creation for big lenses. They provide a really solid base at the lens foot and the freedom of movement is perfect for following and recomposing shots. I use a Movo GH 700 Gimbal Head When attaching the lens foot to the gimbal head, slide it forward and back to find the centre of gravity – you want the lens to stay balanced without it being locked in place; this will help with balance. Once  you have it in the correct place make sure it’s tightened up in place. You can then use the two tension knobs to get the desired amount of movement – both up and down (tilting) and left and right (panning). For following birds in flight you will want to slacken it off enough to allow fast tracking of your subject, whilst for more static subjects tightening up the knobs will aid in stability and reduce camera shake, but still allow enough movement to recompose.

When photographing static subjects and particularly with lower shutter speeds you should try to reduce vibration. Long lenses will magnify even the smallest amount of movement, potentially causing blurred images so it’s worth a bit of extra technique. Drape your non-shutter hand lightly over the lens barrel – around half way down then lightly push your eye into the viewfinder. This combination will help brace the lens and can definitely reduce camera shake. You can see me using these techniques with my 500mm, photographing birds in this YouTube video Using image stabilisation is another option too but with older lenses it’s best to have this switched off anyway if on a tripod. 

Beanbags and Other Support

In my opinion the best way you can keep a long lens stable is by using a beanbag. This is ideal when shooting on the ground or on a car roof for example. Make sure that the part of the lens near the camera body is snugly into the beanbag. Use your non-shutter hand to push down slightly at this point. You can also pull down slightly on the shutter. With good technique you can achieve sharp images down to as slow as 1/15 of a second. Another option is to use a beanbag on top of a tripod. Take the tripod head off and put the beanbag on top, balanced evenly; then use the same technique. I’ve used this method successfully when photographing wild owls in Serbia – see the YouTube video and achieved sharp results at very low shutter speeds. Think out of the box too: you always have your knees with you so why not use one as a support when caught short?

A long lens is ideal for nature photography but you can’t be sure of sharp images without learning a little technique. Employ these tips and you’ll greatly increase your chances of pin sharp images!

Paul Miguel is professional Nature Photographer in Leeds, England. He runs a range of Wildlife Photography Workshops in the UK and Photography Tours Abroad

Share

How to Photograph Birds in Flight

photographing birds in flight

Photographing action is one of the toughest aspects of wildlife photography and none more so than photographing birds in flight. It requires practice and perseverance – along with a little technical know-how.

What Lens to Use?

For the majority of bird photography you’ll need a fairly big lens – probably 400mm or bigger; but for birds in flight a 300mm may suffice. The focal length however isn’t the only consideration. Are you likely to be hand-holding? In this case the weight is a significant issue. If you’re not sure, the best way is always to test one out – you’ll soon get an idea just how long you can hold it for! I’ve been a Canon user for a long time and the Canon EF 300mm f 2.8 (Mark i and Mark ii) has long been regarded as one of the best lenses out there for photographing birds in flight. Other options include the Canon EF 400mm f5.6 and the Canon EF 100-400mm f4.5 – f5.6 IS (Mark i and Mark ii). All these lenses are suitable for hand-holding and can be carried around for reasonable amounts of time. Longer lenses such as the Canon EF 500mm f4 IS (Mark i and Mark ii) and the Canon EF 600mm f4 IS (Mark i and Mark ii) can also be excellent for flight photography but can only be hand-held for short periods of time due to their weight It’s more appropriate is to use these larger lenses with a tripod and a gimbal head allowing for quick changes of direction when tracking birds.

Flight Photography Technique

It’s tempting to try and concentrate solely on keeping the bird within the focus points. Whilst this is the idea, I find it best to try and match the speed and movement of the bird – so try and think of it more that way when you’re tracking. When hand-holding try to pan from the waist whenever possible; stay reasonably relaxed and fire the shutter smoothly: watch the YouTube video to see me demonstrating When using a gimbal head, make sure you adjust the resistance knobs so it is comfortable for you. It’s also important to be aware of relative speed. If a bird is in the distance you won’t have to move the camera as quickly but once it comes near you will have to pick up the speed of panning. Most modern lenses will also have image stabilisation/vibration reduction. It is sometimes believed that they help to get sharp images of action but in reality that’s not really the case. Using IS or VR won’t stop movement of your subject – and with fast shutter speeds it probably won’t have much effect on camera shake either. However, it can help by stabilising the viewfinder, thereby making tracking a little easier.

Shutter Speeds and Apertures

Above all you need a fast shutter speed for birds in flight. I like to be at 1/1000 or faster most of the time. However, every situation varies. Whilst 1/1000 is a good shutter speed to aim for, slower moving birds such as hunting owls can be photographed with slower speeds such as 1/500. On the quicker side, a diving red kite for example or a small bird in flight, and you’ll often need 1/2000 or higher.

how to photograph birds in flight
Red Kite in dive, 1/3200 with 300mm f4 lens

As for choice of aperture, setting a fairly wide aperture will let in more light, helping to keep the shutter speed higher. That said, I like to stop down a little to ensure a greater depth of field throughout the bird. With a lens of 400mm or 500mm I’ll often use around f7.1. In terms of ISO it’s really a case of adjusting this to give you an accurate exposure without creating too much noise in the image. In bright light you might not need to go above ISO 400 whilst in duller conditions and when shooting near sunrise or sunset you might be closer to ISO 2000.

Focusing and Frame Rate

For birds in flight you’ll need the tracking auto-focus option. The will be AF-C on Nikon and AI Servo on Canon. So long as you keep the focus engaged this will track the bird continuously. You can focus with the shutter button (half pressed) or you can use the Back Button Focusing method. Experiment to see what works best for you. You need to have the frame rate set to continuous as you’ll want to take a burst of images. Modern cameras can shoot 14 frames per second and more but the majority of the time a frame rate of around 7 frames per second is sufficient. On advanced cameras such as the Canon 1DX you can set a maximum and minimum frame rate. 

When it comes to the actual area of focus there are a number of options. A single focus point in the centre can often be accurate. However, a small cluster of 4 or 9 for example, around the centre is also a good option. My advice is to use less focus points if the background is a little ‘busy’ and if the bird is relatively small in frame. If the bird is more frame filling with a good clear background then you may be able to use all the focus points effectively.

photographing birds in flight
Red throated Diver; 400mm lens, 1/1600 with centre cluster of focus points, shot at 10 frames per second

Exposure

This is probably the trickiest of all and you should experiment to find your favoured way of exposing for birds in flight. If lighting conditions are consistent then manual exposure can work well. In bright sun with clear skies, set your desired shutter speed and aperture, then point the camera directly above at the deepest part of the blue sky. Adjust the ISO until the exposure meter is in the centre. This will give you a good base reading; you may need to adjust slightly. The advantage of manual exposure is that you are in complete control of all settings. Aperture Priority, A or AV, can be ideal and certainly works well in changing light. Here you will set your preferred aperture and the camera will select the shutter speed. Adjust the ISO so you are getting a fast shutter speed of around 1/1000. One issue with this method is if the sky is quite light you will need to add some plus exposure compensation (overexpose) to stop the image coming out too dark. Shutter Priority mode can also be used but is more complicated to achieve consistent results.

Click Here to watch my video on Understanding Exposure

flight photography
Red footed Falcon; 500mm f4 lens, shot on Manual exposure at 1/1250 at f 7.1; ISO 1600

Auto ISO is another useful exposure tool where the camera adjusts the ISO itself. In manual exposure you can set both the shutter speed and aperture then select Auto ISO; only the ISO will change. In Aperture Priority you set the aperture and the camera adjusts the ISO (and shutter speed to an extent).

There’s a lot when it comes to photographing birds in flight but like anything it just takes practice. Put all these skills to good use and you’ll soon be surprising yourself at the quality of your bird shots! If you want to improve your wildlife photography skills consider joining one of my Wildlife Photography Workshops or a day of tailor made One to One Tuition

Share

I had to Resort to Hand-holding

I had to Resort to Hand-holding

“I need a change” I thought. Time for some landscape photography. So here I was on location at a beautiful reservoir on the outskirts of the Yorkshire Dales. As I set off I could feel the relaxation beginning to set in – much welcome after many days in the office. I was soon drawn to a view of the distant hills –  a mixture of light and shade alternating across the landscape. I set up the tripod, attached my 50mm lens – and then… disaster! As I went to put the camera on tripod I realised there was no plate on the bottom! Now quite why I had taken it off, I can’t actually remember. But the fact was… I had. Despite racking my brains I could think of no way to attach the camera properly. Annoyed was not the word!! So after cursing myself for a good few minutes I decided not to give up on the evening. This was my time to enjoy, to create and I was going to make the most of it. So I set myself the challenge of capturing the best images I could hand-holding.

I set the ISO at 400 and the aperture of f/8 – a decent combination to avoid slow shutter speeds whilst getting reasonable depth of field. I worked with one lens – my Canon 50mm 1.8 – the nifty fifty as it’s called.. or ‘plastic fantastic’. Then it was a case of finding compositions that would work – using the fading sunlight of the evening. A mature Horse Chestnut tree was looking appealing and I shot towards the light, back-lighting the leaves and the nettles below.

A patch of Foxgloves looked beautiful as the hazy sun began to disappear behind the hillside. I experimented with a number of compositions and took a few shots with slight glare at the top of the frame – something I would rarely do.

Despite being initially frustrated, it was perhaps a blessing in disguise. Working with just one lens forced me to look for specific compositions and concentrate hard on each image – a good way of challenging yourself as a photographer. By the end of the shoot I felt that I had been genuinely creative and I could go home happy. That said – I don’t ever want to forget the plate again!

Share