Fill-in Flash for Wildlife Photography

Fill-in Flash for Wildlife Photography

Fill-in Flash can be a wonderful tool for improving your images. Whilst I’d always advocate using purely natural light, occasionally we just need that extra little something to boost our images. Fill-flash is a great technique when used carefully, and thoughtfully.

What Flash do you need?

If you’re close to the subject then a pop-up flash on the camera can actually make a difference. However, I’d advise investing in an external flashgun that will give you greater power and put out more light. I use the Canon Speedlite 580 EXii – a powerful flash unit that ‘talks to’ the camera via its ETTL mode. If you’re looking to purchase a flashgun, check out the relevant Guide Numbers (GN) to get an idea of how powerful the flash is; this is particularly important when working out in the field with wild birds and animals.

What are the Benefits of Fill-in Flash?

There are four main benefits of using fill-in:

    1. Where the bird or animal is on the ground. The majority of the body may be lit but it’s quite common for the underside to be in shade. A touch of fill-in flash can brighten up this shadow area, giving a better balance to the image.
    2. This is similar to above, but more extreme. When shooting strongly back-lit, all of the subject facing the camera will be in heavy shade, often losing detail. Using fill-in flash will again brighten up the shadow, bringing back detail. It can also help restore colour balance.
    3. For birds with iridescence. Iridescent feathers appear to reflect all kinds of colours, often greens and blues. Good examples are Rooks, Magpies, Starlings and male Mallards. Using a small amount of fill-flash can help to bring out this quality of the feathers.
    4. To add a highlight in the eye. In addition to the above, a touch of flash can add a catch-light to the eye which helps to bring the subject to life.

What’s the Technique?

Essentially you want to use the same exposure settings you would for natural daylight and aim to expose for the highlights. The fill-in flash then brightens up any shadow areas but won’t affect the lit areas. Once you’ve set your exposure you want to reduce the flash output from its automatic setting. If you’re using on-camera flash, with the TTL option, reduce the power of the flash by around -1 and 2/3 EV. This is a good setting to start from. If filling the frame with dark subjects such as a purely black coloured bird for example you might need to reduce the flash more, even down to -3 EV, as the flashgun will want to put out too much flash. It’s often about experimenting; remember – the idea is to add just enough flash to improve the image, with it barely being noticeable. Alternatively you may be able to change the flash output manually in which case you could try around 1/16 of full power. On my camera, the Canon 1DX Mark i, I can actually change the flash output in camera using the flash +/- compensation dial – this is perfect as it means I don’t need to take my eye away from the camera.

No Flash
Fill-in Flash at -1 and 2/3 EV

On many flashguns you’ll notice a zoom setting. This allows the flashgun to fire the flash at a similar angle of view (mm) to the lens being used. This should automatically change when the flash is attached to the hot-shoe – if not you can alter it manually. An important point to note is the flash synchronisation speed. Most cameras have a maximum shutter speed that will synchronise with a flashgun, often around 1/250 of a second. Use a faster shutter speed than this and the two won’t work together properly. To enable the flash to synchronise with a faster shutter speed you need to use the high speed sync option. On the Speedlite you will see the flash symbol and a ‘H’ next to it. When this is selected your camera and flash will work together with up to the fastest shutter speed available. This is particularly important due to the fact that when shooting wildlife, in natural light, you’ll often be using a fast shutter speed.

Recycle Time and Batteries

You won’t be able to continuously shoot with your flash unless you have an extra battery pack. I tend to do single shots and let the flash recycle; within a second or two it will be ready to fire again. Use rechargeable batteries in your flashgun. Better than alkaline, I’d recommend the NiMH (see Eneloop) – these hold charge better and have great reviews.

Red-eye Problems

You may occasionally get ‘red-eye’ when using fill-in flash. This is where the light reflects from the retina and straight back through the lens. Using a flash further away from the camera will help to avoid this; in some cases it might be necessary to mount the flash separately to the side of the camera. I’ve also found that angling the flash away (whilst still on the hot-shoe) can also help if the flashgun has this facility.

See the slight Red-eye in this image of a male Mallard

A word about using flash with wild creatures: research suggests that flash used in daylight will have no detrimental effect on the subject. I agree with this and I don’t see issues using fill-flash on wild birds and animals. However, using flash as the main light source, e.g. shooting at night is very different. This has been shown to temporarily blind owls for example and should be seriously considered. You’ll find some useful information on this topic in these blogs from Tom Mason and Keith Elcombe A much better option in my opinion is to use LEDs


Diffusers and Extenders

Using a diffuser on the flashgun is unlikely to soften the light at a distance; this is because the diffuser spreads light out rather than softens it. If you do use it in the field you’re also going to have to increase the flash output which will increase battery consumption. My own view is that a diffuser may improve the quality of flash light at a short distance. Extenders on the other hand work by concentrating the flash into a narrower field of view – they are more direct and therefore sensible to use in the field. Better Beamers are a popular option although they usually require a separate arm to move off camera to get the best effect.

There’s plenty to learn when it come to Fill-in Flash. The easiest way is to simply practice on a static subject outside, adjust your settings and see what works. Remember: you are still using natural light as your main light source – the flash just acts as a secondary light source to brighten the shadows, lift the image a little, and add a catch-light to the eye. Above all – don’t over-do it!

Share

Photographing Red Grouse in Yorkshire

photographing red grouse

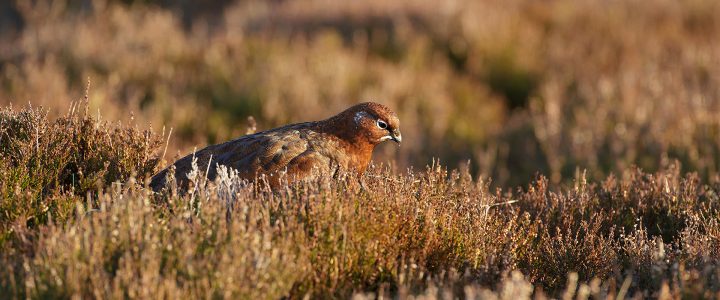
Ever since my first visit to Swaledale many moons ago I’ve been in love with Red Grouse. I’ve lost count of how many times I’ve visited over the years. One particular location provides reliable opportunities with Grouse frequenting the roadside heather. Every day is different but it’s not unusual to get extremely close views if you use the car as a mobile hide. I recently spent a winter’s morning up on the moors, using my Canon 500mm f4 Mark i lens. The technique is fairly simple – just wind down the window and use a good quality beanbag as your camera support. Beanbags provide particularly good support for long lenses and I personally prefer this to using a tripod.

To increase stability I also push down slightly on the barrel of the lens with my left hand; with good technique you can use surprisingly slow shutter speeds if the bird is relatively still. Red Grouse are beautiful birds but they seem to have that kind of plumage that camera’s don’t like! If you’re using off centre focus points and the camera is struggling, try switching to the centre focus point and recomposing – you might find the focus more accurate. Above all try to spend as much time as you can when you find a photogenic bird: capturing some kind of behaviour will really lift your images.

Share

Canon 400mm 5.6 Lens Review

Canon 400mm 5.6 Lens Review

This is my review of the Canon 400mm EF f5.6 USM lens, having professionally used this lens for wildlife photography for a number of years.

When it comes to choosing the right lens for wildlife there are a number of considerations. It’s important to take them all in to account and also to think about the situations you are most likely to use the lens in.

Weight

This is often not considered enough, but it’s a really important one. If you are likely to be carrying the lens for extended periods of time and in particular, hand-holding, then weight is big consideration. With a bigger more expensive lens you might find it feeling quite a burden. The Canon 400mm f5.6 is extremely light, weighing in at 1.25kg. This makes it perfectly easy to hand-hold for most people and can be carried around for hours. Being so lightweight I find it ideal for  flight photography –  no need for support, I can simply use my left hand to support the lens as I follow and fire. Comparing this to my Canon 500mm f4 IS Mark i, at a whopping 3.9kg, and you can see the benefit!

Image Quality

Of course there’s no point having a light lens if the image quality is poor. When I first bought this lens years ago I was significantly impressed with the sharpness. In my opinion it’s of professional standard quality when paired with a good quality camera body. I’ve created images with this lens with both a Canon 1D Mark iv and a Canon 1DX Mark i. A number of these photos have been supplied to professional picture libraries and been printed large on calendars and magazine covers. Sharpness is always a difficult one to describe, without providing complex tests. To get the most out of this lens try to stop down to f/7.1 or f/8 – it will improve the clarity. I rarely use it at f/5.6 but then I wouldn’t do anyway. Use this lens in good light with good technique and you really shouldn’t have any complaints.

canon 400mm f5.6 review
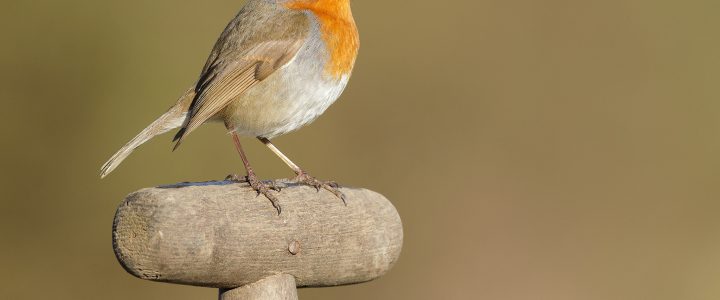
Robin on spade, Canon 1D Mark iv with Canon 400mm f5.6 lens at f/7.1

Speed of Focus

In good light this lens focuses quickly; you’ll have no problem for wildlife portraits. For action it performs pretty well in good light and I’ve made many sharp images of birds in flight, using a centre focus point and a small cluster. I also find changing the focus limiter switch to 8.5m – infinity can improve speed for flight photography. Where this lens begins to struggle is in poor light: in low sunlight or overcast conditions the focus definitely starts to struggle and you need to use the best technique you can. This is the main drawback of the lens for me. The minimum focus distance is 3.5m which is also a disadvantage in some situations. Note: this lens does not have any IS, however for me I don’t find it much of an issue.

canon 400mm f5.6
Arctic Tern in flight; Canon 1DX Mark i with Canon 400mm f5.6 lens, 1/1250 at f7.1, ISO 21600

Extenders and Extension Tubes

If you want to increase the magnification of the 400mm then you can attach extenders. I’ve never tried a 2x extender but have used the lens with the Canon EF Mark iii 1.4 x Extender. With older cameras you may use auto-focus completely. My current understanding is that Canon 1D and 5D bodies will accept the combination but only allow you a centre focusing option and don’t allow the choice of different focus points. You’ll also be down to f/8 once the extender is attached. Quality with a 1.4x extender is reasonable but it helps to keep the ISO low and even stop down the aperture a little more for optimum quality –  I regularly use f/9 or f/10. I wouldn’t want to use this combination in overcast light with a high ISO. 

In order to make small birds more frame-filling you can attach an extension tube. I’ve sometimes used the Canon 25mm extension tube with this lens in order to reduce minimum focusing distance and get closer. This also has the effect of diffusing the background slightly more. You lose a bit of light but still retain auto-focus and exposure control.

canon 400mm f5.6 lens
Blue Tit, Canon 1DX Mark i with Canon 400mm lens and 25mm extension tube

Price

At the time of writing you can get a brand new Canon 400mm f5.6 for close to £1000 and a used one near £500. This is massively cheaper than most competing lenses and makes it ideal for those on a tighter budget.

Other Options

There are many other options for bird photography. Heavier lenses with superior auto-focus include the Canon 500mm f/4 and 600mm f/4 and the Canon 400mm f/2.8. You could also opt for a Canon 300mm f/2.8 and use with extenders. There’s also the 400mm f/4 DO – light enough to hand-hold but with very mixed reviews. The Canon 100-400mm f/4.5-f5.6 Mark ii is also a serious contender due to flexibility, quality and weight. All of these lenses however come with an increase in price.

Conclusion

Remember that the best lens for you is the one that works for you. Are you likely to be sat in hides for hours with a tripod, or are you more likely to be walking around and shooting hand-held in the field.? It’s important to take this into account when choosing your lens. The Canon 400mm f5.6 should always be a consideration. It isn’t the fastest lens; it isn’t the sharpest lens. However it does offer a high level of quality for an amazing price. That’s why I’ve used it myself. The main drawbacks are reduced auto-focus speed in poor light, minimum focusing distance and lack of IS. If you can live without these things then buy it in a heart-beat – I still believe it’s one of the best lenses ever made by Canon for pure value

To see more of my wildlife photography visit the Gallery Pages on my website.

Share

Long Lens Photography Technique

paul miguel youtube

For a long time I didn’t own a ‘big lens’ for my bird photography. I made do with shorter lenses and extenders. Finally the day came when I received my Canon 500mm f4 Mark i lens. I’m still using it to this day, but I’ve learnt a few tips along the way which help me get the most out of it.

Having serious pulling power is great when it comes to wildlife photography, but it can all count for nothing if you don’t use your lens effectively. Big lenses, by which I would consider anything from 400mm and greater, tend to be heavy pieces of kit and need a certain level of technique to manage them effectively.

Hand-holding

You may not want to hand-hold, certainly not for extended periods of time, but there are situations where this is preferable. For birds in flight, I much prefer to hand-hold as I just feel more comfortable with my freedom and range of movement. To hand-hold with a big lens try to hold the camera and lens sideways, rather than point it in front. Place your hand under the lens and keep your elbow close to your body. Most people can only do this for short periods of time – when waiting for action you could keep the lens on the ground by resting it upside down on the lens hood. Alternatively I like to carry a beanbag then rest the camera on here whilst I’m waiting, knowing it’s more protected.

Tripods and Heads

Without doubt the best way to support a long lens is with a tripod. Carbon fibre is a great option as it is strong but relatively light. Not surprisingly, this also makes them expensive. To mount the lens I would advise two options – either a very solid ball head, or a gimbal head. Personally I think the gimbal head is a wonderful creation for big lenses. They provide a really solid base at the lens foot and the freedom of movement is perfect for following and recomposing shots. I use a Movo GH 700 Gimbal Head When attaching the lens foot to the gimbal head, slide it forward and back to find the centre of gravity – you want the lens to stay balanced without it being locked in place; this will help with balance. Once  you have it in the correct place make sure it’s tightened up in place. You can then use the two tension knobs to get the desired amount of movement – both up and down (tilting) and left and right (panning). For following birds in flight you will want to slacken it off enough to allow fast tracking of your subject, whilst for more static subjects tightening up the knobs will aid in stability and reduce camera shake, but still allow enough movement to recompose.

When photographing static subjects and particularly with lower shutter speeds you should try to reduce vibration. Long lenses will magnify even the smallest amount of movement, potentially causing blurred images so it’s worth a bit of extra technique. Drape your non-shutter hand lightly over the lens barrel – around half way down then lightly push your eye into the viewfinder. This combination will help brace the lens and can definitely reduce camera shake. You can see me using these techniques with my 500mm, photographing birds in this YouTube video Using image stabilisation is another option too but with older lenses it’s best to have this switched off anyway if on a tripod. 

Beanbags and Other Support

In my opinion the best way you can keep a long lens stable is by using a beanbag. This is ideal when shooting on the ground or on a car roof for example. Make sure that the part of the lens near the camera body is snugly into the beanbag. Use your non-shutter hand to push down slightly at this point. You can also pull down slightly on the shutter. With good technique you can achieve sharp images down to as slow as 1/15 of a second. Another option is to use a beanbag on top of a tripod. Take the tripod head off and put the beanbag on top, balanced evenly; then use the same technique. I’ve used this method successfully when photographing wild owls in Serbia – see the YouTube video and achieved sharp results at very low shutter speeds. Think out of the box too: you always have your knees with you so why not use one as a support when caught short?

A long lens is ideal for nature photography but you can’t be sure of sharp images without learning a little technique. Employ these tips and you’ll greatly increase your chances of pin sharp images!

Paul Miguel is professional Nature Photographer in Leeds, England. He runs a range of Wildlife Photography Workshops in the UK and Photography Tours Abroad

Share

Bird Photography Tips and Tricks

bird photography tips and tricks

When it comes to capturing strong images of small birds there are a few tips and tricks you can use to improve your bird photography. 

Perches

Birds on feeders rarely make for great photos; it’s much more natural, and fun, to photograph them on attractive perches. It’s important here to use a suitable perch, so if you’re not familiar with the species it might be worth a little research to understand the habitat the bird lives in – that way you can find an appropriate perch. When it comes to finding perches it’s simply a case of searching around. If you’re working in a woodland setting then hopefully you can find branches and logs covered in moss, lichens or even fungi; this is going to add some extra colour to your images. It’s also important to consider the size of the perch – a thick branch covered in lichens may look wonderful… but is it going to dwarf the small tits that land on it? Bigger logs and branches can be ideal for larger birds such as blackbirds and jays, but for small birds try using thinner more delicate branches and twigs.

Getting them on the perch!

So you’ve got a suitable perch for your chosen bird – how to you get the bird to land on it? The tried and tested method is to use food as bait. Garden birds for example will easily come down to bird seed, peanuts, fat-balls – and meal worms. Watch which direction the birds come from – they will often congregate in a nearby bush or tree. After watching their flight path you can then erect your perch near the food so that the birds land on it before they visit the feeders. This won’t work every time, some birds will ignore the perch (that’s nature) but you should get enough opportunities for photography. There are different ways to set up the perch, including poles, tripod attachments and pushing into the ground. Once the bird lands you need to be quick – focus, compose and fire a series of shots. You should be able to do this in less than 2 seconds – which is sometimes all you’ll have! If you’re interested in setting up bird feeders check out this YouTube Video where I set up a bird feeding station.

bird photography tips and tricks
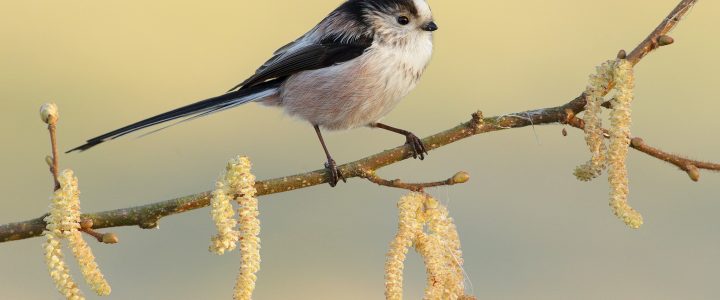
Long tailed Tit on willow twig with catkins; perch placed close to fat-ball feeder

Background

Perhaps equally as important as the perch is the background. A good bird photograph can succeed or fail depending on choice of shooting position. Try to avoid too much distraction behind the bird – this can take some experience but essentially you want a background that will go nicely out of focus when you focus on the bird. Tree trunks, light coloured branches, highlights and shadows can all cause problems. Try to shoot against an area that looks as smooth as possible – in the same light. Also try to find a background that is quite distant; this will instantly help to give a clearer backdrop. Another way to improve things is to use a wide aperture – this will blur the background more, but it won’t compensate enough if the background is just too cluttered.

bird photography technique
Great tit on Holly; shot towards a clear grass field for soft background

A brief word about mini-ecosystems. Moving branches, logs and rocks can affect what grows there – lichens and mosses in particular thrive on very specific micro-environments. You may also be affecting small invertebrates that live there too. That said, we are talking about very occasional changes and I do not consider it to be detrimental to the environment. If you end up with a few logs and branches that have been used as perches, then create a new pile – and a new ecosystem! A word too on hygiene: if you are feeding birds, please wash your hands before, or at the very least give them a good rub. Birds are susceptible to germs just as we are!

 There really is no limit to the types of bird photographs you can create given the multitude of perches out there. Think shape, texture, colour – and get creative! If you want to improve your bird photography skills consider joining one of my Bird Photography Workshops or a day of tailor made One to One Tuition

Share

Iceland Photography Tour Report 2018

Iceland Photography Tour Report 2018

In June 2018 I spent seven nights in Iceland in the enjoyable company of three clients – Shelley, Nigel and Craig. Iceland’s weather is very changeable and you never quite know what to expect. Upon arriving we were treated to glorious conditions with clear blue skies and thin cloud providing beautiful light. Our first part of the tour concentrated on Red throated Divers. This special breeding site on the south of the island really is a remarkable place for bird photography. I’ve been here three times previously and captured stunning images of the divers, but you never get bored of these birds… and there’s always something new to photograph. Over three sessions we managed some quality images – often in near perfect light. At 10.00pm we were still shooting, such are the long days of Iceland’s summer. The light at this time is wonderful – just perfect for bird photography.

iceland photography tour

photographing red throated divers

red throated diver photography

Watch my YouTube video of the Red throated Divers

I set myself the challenge of Red throated Divers in flight and concentrated my efforts on one pond. Many divers would fly over, eliciting responses from below with their constant wailing calls. During two evening sessions the sky was almost completely clear, giving perfect backdrops for divers in flight. A few days before the trip my 500mm lens had suddenly failed, so I was making do with the Canon 400mm f5.6. Whilst not as fast, it certainly makes hand-holding easier – and with good light, it’s actually pretty good for flight photography. Around the pools we also photographed a range of birds including Snipe, Red necked Phalarope and Whooper Swan.

red throated diver in flight

flying red throated diver

photographing red throated loons

red throated loon photography

red throated loon tour

snipe photography

Our next leg of the trip included a long drive East, stopping at Vik. The weather was pretty wet here with murky low mist but I was determined to get some images of the beach. Despite the wind and rain (not unusual in Iceland!) I attached my Canon 50mm 1.8 lens and did the best I could hand-held. In these types of conditions I find hand-holding a good option as you can quickly put the camera away should it become too wet. The rain eased off slightly and I went for some shallow depth of field images using the church in the background. Again, hand-held. Despite the dank conditions, Redwings regularly flitted around the lupins occasionally perching on the fence posts.iceland nature photography tour

vik photography iceland

We stopped again briefly, on our return journey and in (slightly) drier conditions I captured photos of the rock stacks – again using shallow depth of field with the flowering lupins as foreground. For this image I used my Canon 100mm f2.8 and took a number of shots varying the focus. I preferred the focus purely on the distant rock stacks.

iceland photography trip

View the 2019 Iceland Photography Tour with Explore Nature

Our last part of the tour included Jokulsarlon, the magnificent ice lagoon. It’s no overstatement to say that this is a photographer’s paradise. From landscapes to wildlife, and something in between, you could shoot here all day. The landscape constantly shifts as the tide brings in new blocks of ice -and washes them away again. Every day is different – not just in the moving icebergs but also in the varying hues of blue. We all managed some landscape photographs and I was particularly pleased to get something decent from the beach – a very strange and quite baron looking environment. Craig particularly enjoyed the landscape and the opportunities to capture more environmental images of birds.

jokulsarlon photography tour

iceland photography tour


photographing jokulsarlon beach

Nigel was in his element, using his 600mm lens to capture Snow Buntings, Arctic Terns and Skuas. The Snow Buntings here are remarkable, allowing really close views. They would constantly hop around the rocks, including juveniles waiting to be fed. Even a torrential downpour didn’t stop these hardy little birds – the males even carried on singing! 

bird photography iceland

icelandic bird tour

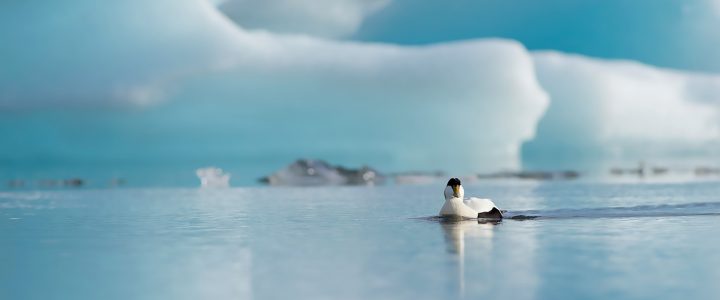
Shelley was content to stay by the water’s edge photographing Eiders and Barnacle Geese as they slowly drifted by in this unique habitat. A long lens isn’t always the best option at Jokulsarlon. Switching to something smaller really allows the environment to come into frame. A 300mm or 400mm can be ideal, or even a 200mm zoom.

icelandic wildlife tour

bird tour iceland

The Arctic Terns at Jokulsarlon provide amazing photo opportunities – from perched groups on icebergs to frantic mass diving into the glacial waters. We all spent time trying to capture a range of shots, including wider views of terns in the habitat. Skuas were constant companions too – as they mercilessly harassed the tern colony!

paul miguel photography iceland


iceland photography guide

iceland tour guide

arctic skua iceland

We spent three nights at Jokulsarlon, thoroughly enjoying our time there. We booked our last night at Keflavik, near the airport, and our final day saw the long journey back. Still, we had many opportunities along the way for even more photography, stopping for a beautiful landscape view near Skaftafell and a small waterfall by the roadside. You could literally stop round every corner in some parts of Iceland.!

landscape photography tour iceland

iceland landscape photography tour

iceland photography group

Our final stop was Seljalandsfoss – one of the more popular waterfalls in this part of Iceland. With flowering buttercups below and flying Fulmars above it was a lovely end to our week’s photography. Check out the 2019 Iceland Photography Tour which I will be leading for Explore Nature. For other Nature and Wildlife Photography Tours visit my website at Nature Photography Tours You can watch the video of this 2018 Iceland Tour Here on YouTube

7 night iceland tour

Hopefully this blog inspires you to take your own trip to Iceland. Whilst the country has grown rapidly in tourism, you can easily find places all to yourself without too much effort. Just get off the beaten track… and enjoy the solitude and serenity this country has to offer.

iceland photography tour group

To see more of my landscape and wildlife photography view the galleries at www.paulmiguel.co.uk 

paul miguel photography tours

You can see more photography from Shelley Knight at shelleyknightphotography.co.uk

shelley knight nature photography

Watch a range of Wildlife Photography Videos on my YouTube Channel

paul miguel youtube

Paul

Share

I had to Resort to Hand-holding

I had to Resort to Hand-holding

“I need a change” I thought. Time for some landscape photography. So here I was on location at a beautiful reservoir on the outskirts of the Yorkshire Dales. As I set off I could feel the relaxation beginning to set in – much welcome after many days in the office. I was soon drawn to a view of the distant hills –  a mixture of light and shade alternating across the landscape. I set up the tripod, attached my 50mm lens – and then… disaster! As I went to put the camera on tripod I realised there was no plate on the bottom! Now quite why I had taken it off, I can’t actually remember. But the fact was… I had. Despite racking my brains I could think of no way to attach the camera properly. Annoyed was not the word!! So after cursing myself for a good few minutes I decided not to give up on the evening. This was my time to enjoy, to create and I was going to make the most of it. So I set myself the challenge of capturing the best images I could hand-holding.

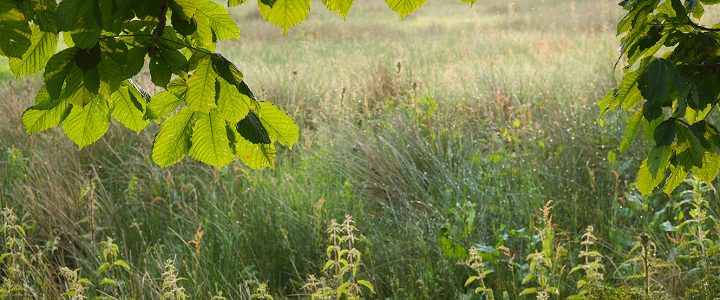
I set the ISO at 400 and the aperture of f/8 – a decent combination to avoid slow shutter speeds whilst getting reasonable depth of field. I worked with one lens – my Canon 50mm 1.8 – the nifty fifty as it’s called.. or ‘plastic fantastic’. Then it was a case of finding compositions that would work – using the fading sunlight of the evening. A mature Horse Chestnut tree was looking appealing and I shot towards the light, back-lighting the leaves and the nettles below.

A patch of Foxgloves looked beautiful as the hazy sun began to disappear behind the hillside. I experimented with a number of compositions and took a few shots with slight glare at the top of the frame – something I would rarely do.

Despite being initially frustrated, it was perhaps a blessing in disguise. Working with just one lens forced me to look for specific compositions and concentrate hard on each image – a good way of challenging yourself as a photographer. By the end of the shoot I felt that I had been genuinely creative and I could go home happy. That said – I don’t ever want to forget the plate again!

Share

Landscape Photography: How to Photograph Frost

Landscape Photography: How to Photograph Frost

I spend a lot of time watching the weather – and when temperatures are set to dip below zero I’m ready to get out with the camera. True winter weather is one of the joys of landscape photography – unfortunately it’s something that’s been sadly lacking in the U.K. for the past few years. On this particular morning, temperatures were forecast to reach -4 degrees in rural areas. Combined with low winds, the conditions were looking good and I was up early to visit a local site close to Leeds, West Yorkshire.

I arrived to glorious conditions – thick frost… everywhere! In these situations the biggest difficulty is often choosing what to photograph. Rather than begin to shoot straight away, I took a stroll around the area, noting the best compositions and trying to decide where the light would hit first. Big undulations in the land meant that certain areas wouldn’t get any sun for quite some time. There were a few good options but I started with a simple composition of the frosted heather and Birch trees, using my 50mm lens. Here I wanted everything sharp so I used f/14 to ensure good depth of field.


What I really liked about the image, apart from the frost, was the slight mist in the air, helping to add a little more atmosphere. I tried the image with a polarising filter and whilst it enhanced colour and contrast – it seemed to take away from the atmosphere. I actually preferred the shot without the filter – and with a little overexposure in post-processing.

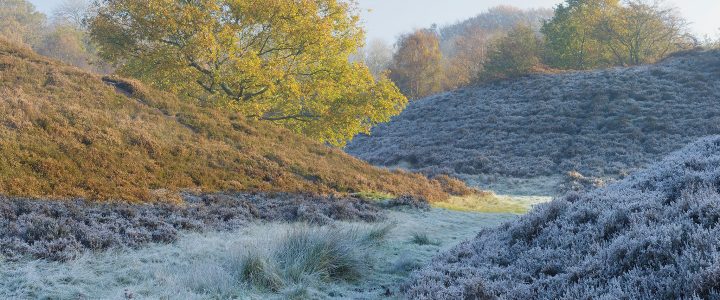
Very quickly the sun was up and beginning to cast strong light onto higher ground. Lower down the frost still stay thick, having not received any sunlight. This led to a really interesting scene with a mixture of light and shade. While the sun was strongly illuminating an Oak tree and surrounding heather, the foreground remained in shadow. Often in strong light the shadow areas can be too dark but here the frost was making a huge difference in brightening things up. I took a number of images trying both landscape and portrait compositions. A polariser improved this image when rotated fully.


Drawn by the strong colour and contrast I moved in closer and shot the Oak tree and heather, this time using my wide angle 24mm lens, again with a polarising filter. By this point the frost was beginning to melt – often the case here in the U.K where such opportunities can be fleeting.

Often it’s so tempting to photograph the wider views but the smaller details can sometimes provide better images. Whilst shooting a wide landscape I kept looking at the frosty Oak nearby. Many of the leaves were still frosted and they showed up well against the shaded background. I switched to my 100mm lens and began to investigate compositions. The light was beautiful. Shooting almost into the sun, the colourful leaves were perfectly lit whilst the shaded background added more winter atmosphere to the image.  For this exposure I used an aperture of f5.6. This was definitely my favourite shot so far!

This was my first frosty photography session of the season and the conditions could barely have been better. With the sun getting higher I decided the best images had been taken and I set off for home, albeit taking a brief detour to capture these birch trees in semi-shade against autumn colour.

All images were taken with a Canon 1DX mark i using Canon 24mm, 50mm and 100mm lens and Induro tripod. If you’d like to learn the skills involved in capturing landscape images like these then why not book a One to One Nature Photography Workshop To see more of my landscape photography check out the Photo Galleries  on my website.


Share

Photographing Spider Webs

Photographing Spider Webs

September is one of those months where I sometimes struggle with what to photograph. The flowers of summer are largely over but the colours of autumn have yet to arrive. There is however one subject that grabs my attention, providing one of the best spectacles a nature photographer could wish for. Spider webs. And lots of them..! A clear night can yield masses of these beautiful structures that glisten in the early morning dew. In fact, it’s not just September – I find that any time from August to November is worth a look in the right conditions.

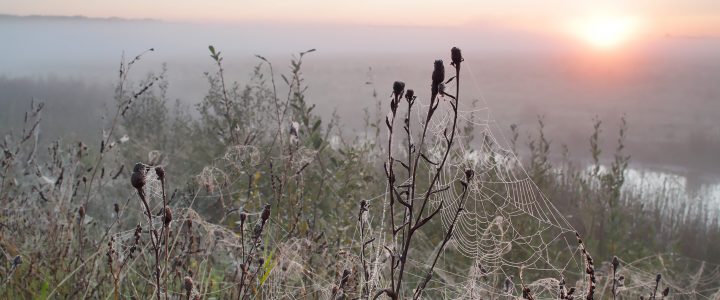
I know my local sites in depth and when good conditions appear I seize the opportunity to make the most of them. With a clear sky overnight and temperatures dipping low, I set off early to my local wetland nature reserve hoping for low lying mists. Arriving before sunrise I was mesmorized by the patchy mist swirling its way through the water channels. The potential for landscape shots was good, but I was equally struck by the sheer number of spider webs, criss-crossing the foliage, like glistening tiny tightropes slung between stems. I turned my attention to the webs, taking my time to find the best compositions.

The image I really had in mind was a wide angle shot – with spider webs in foreground as part of a wider view of the reserve and background disappearing into mist. I decided to stick with my wide angle Canon 24mm. At 6.30am the sun was already starting to burn through the mist so I needed to use a graduated filter to darken the sky; first off I used a 2 stop hard edged ND grad, but as it got brighter I added an additional 2 stop soft edged grad – for these kind of images there is a huge amount of contrast to deal with!


It wasn’t long before the sun’s intensity increased, casting a soft golden glow as it filtered its way through the mist. The stronger light allowed me to compose an image of a string of back-lit webs, separated nicely from the darker background reeds. This image wasn’t easy to achieve – the light really has to be perfect to highlight the webs strongly enough but not completely destroy the mist.


As the sun continued its ascent the mist began to dissipate and I concentrated on isolating the many spider webs that were now strongly back-lit. For these images I opted for my Canon 100mm F2.8 macro; this is such a great lens for this type of photography – perfect for giving that extra separation from the background, helping make the webs stand out.


I went with my instincts, searching for pleasing compositions as I tried to capture the mood of the morning in camera.


Within an hour those special conditions were gone and any more photos just simply wouldn’t match up. I began the walk back, content in the knowledge that I had experienced the best time of the day – and captured some beautiful atmospheric images.

If you are interested in seeing more of my work please visit the Photo Galleries at www.paulmiguel.co.uk.  If you want to learn how to take Nature Photographs like these then why not book a One to One Photography Workshop and receive expert guidance for the day.

Paul

Share

Serbian Birds Photo Tour Trip Report

Serbian Birds Photo Tour Trip Report

I’ve just returned from a successful Bird Photography Tour in Serbia with my two clients Ian and Alec. During the seven night all inclusive tour we used some excellent hides which really delivered, and we experienced incredibly consistent weather. We all managed some ‘firsts’ including the extravagant looking Hoopoe.!

A late night flight to Belgrade meant a quick stop over before being picked up the next morning. We were soon on the road, heading towards Subotica in the province of Vojvodina. Subotica is the most Northern city in Serbia, with many Hungarian influences. After checking into Hotel Galleria we were soon taken for our first hide session: the Tower Hide. Situated in flat, largely agricultural land this hide overlooks a number of small trees used by various breeding birds. This is a one-way glass hide which helps to reduce disturbance; the disadvantages are in loss of light – you lose around a stop. And yes, it can reduce sharpness a little, but with good light and good equipment I think it really is negligible. Nest boxes close to the hide allow amazing views of European Roller, Common Kestrel and Red footed Falcon. Perches have been expertly positioned, giving stunning backgrounds at a good distance for the majority of ‘wildlife’ lenses. During our first session we captured beautifully lit portraits and I managed to bag a decent flight shot of a Roller…  after failing miserably last year.! The hide gets very hot, but such is the nature of wildlife photography – it is a case of suffering for your art. The results are worth it! You can see some Roller Video Footage on my YouTube Channel

Shooting during this time of year means early starts and  the next morning we were out for 5.00am to try the Hoopoe hide. This was a real bonus, having only been set up this year by our hosts. I wasn’t too sure what to expect but it turned out to be one of my favourite hides. Myself and Alec settled into the bigger hide whilst Ian had a pop up hide to himself – both positioned at the same distance from the nesting Hoopoes. Between us we shot with a mixture of 400mm, 500mm and 600m  – all Canon gear.! The setting is just beautiful; perfect for the early morning light with a mixture of background colours and some semi-shade. After taking portraits we all had a go at flight shots, such was the frequency of the returning parent birds.

After a midday break and some lunch we headed for our next photography hide – the drinking pool. This is essentially a reflection pool situated within a woodland site, regularly used by a good selection of birds. The light here is best in the afternoon when the sun is directly behind. The great thing about this type of hide is you never know what’s going to turn up.! The record is around 15 species in one session and we did pretty well – reaching about 12. Both male and female Hawfinch were a delight as they came to drink and bathe; other birds included Tree pipit, male Blackcap, Jay and the beautiful Turtle Dove. The real highlight was when a juvenile Sparrowhawk came in!

After teasing us in the branches it finally dropped down and began to splash in the pool – just yards away! A magical encounter. The visit was a prolonged one… the longest I’ve ever watched a Sparrowhawk for. Whilst this is great if you’re a huge Sparrowhawk fan (like me!) it doesn’t help to attract the smaller birds.! Eventually the bird left and we got a few more images of various species before the light levels started to drop. Light levels aren’t really an issue for filming so I made sure to get some Video footage including this Bathing Jay!

Another early start and this time for pop-up hides at the Bee-eater colony. If you want to photograph colourful birds then you can’t do much better than a Bee-eater! Our host set up the hides, positioned strategically towards the slim perches and then we prepared ourselves. After a bit of a wait the birds were back, landing on the perches and dazzling us in the morning sun. The light was extraordinary – bright, but somehow with a different quality that didn’t seem quite as harsh as in the UK. We photographed a number of food passes, including one with a beautiful blue dragonfly.! The sounds of these birds were beautiful too – a lovely relaxed bubbling as they whizzed around the nest site. I also captured some Bee-eater Video Footage of the food passing.

Towards the end of the tour we visited Palic Lake. This area, designated as a protected nature reserve, is a tranquil haven for birds. Palic is home to a huge Pygmy Cormorant roost, a very interesting subject to photograph, with the dark shapes dotted around the white-washed trees. The tranquillity was only broken by the calls of Egrets and Herons that constantly flew past us over the reedbed. Unlike some reserves in the UK, here there is no struggling for tripod space – in fact, we barely saw a person during three hours. Great Reed Warblers were everywhere and we all managed to get something of this vocal bird.

The long days do take their toll so I had factored in a rest morning half way through. This was a good time to explore Subotica – a beautiful and relaxing city with friendly locals and some superb food.! During the week long trip we visited each hide twice, trying to capture something different. Me and Alec visited the drinking pool again and were quite taken aback when a huge Buzzard bungled itself in by the pool – one of the highlights of the week! On the last day, I went for back-lit Hoopoe shots whilst Alec and Ian tried the drinking pool again. This time they were treated to a male Sparrowhawk. I was gutted!!

This Serbian Photography Tour will run again in mid-May 2018. You can see more Serbian Wildlife on the Gallery Page at www.paulmiguel.co.uk  If you’re looking for a different destination with quality hides and a top class hotel, then this is the trip for you. Serbia really does offer very good value all round. Any questions about these bird holidays please feel free to email on paul@naturephotographycourses.co.uk or ring me on 07759485791. You may be interested in my other Small Group Nature Photography Tours

I’m looking forward to taking next years group already!

Paul Miguel


Share