Fill-in Flash can be a wonderful tool for improving your images. Whilst I’d always advocate using purely natural light, occasionally we just need that extra little something to boost our images. Fill-flash is a great technique when used carefully, and thoughtfully.
What Flash do you need?
If you’re close to the subject then a pop-up flash on the camera can actually make a difference. However, I’d advise investing in an external flashgun that will give you greater power and put out more light. I use the Canon Speedlite 580 EXii – a powerful flash unit that ‘talks to’ the camera via its ETTL mode. If you’re looking to purchase a flashgun, check out the relevant Guide Numbers (GN) to get an idea of how powerful the flash is; this is particularly important when working out in the field with wild birds and animals.
What are the Benefits of Fill-in Flash?
There are four main benefits of using fill-in:
-
- Where the bird or animal is on the ground. The majority of the body may be lit but it’s quite common for the underside to be in shade. A touch of fill-in flash can brighten up this shadow area, giving a better balance to the image.
- This is similar to above, but more extreme. When shooting strongly back-lit, all of the subject facing the camera will be in heavy shade, often losing detail. Using fill-in flash will again brighten up the shadow, bringing back detail. It can also help restore colour balance.
- For birds with iridescence. Iridescent feathers appear to reflect all kinds of colours, often greens and blues. Good examples are Rooks, Magpies, Starlings and male Mallards. Using a small amount of fill-flash can help to bring out this quality of the feathers.
- To add a highlight in the eye. In addition to the above, a touch of flash can add a catch-light to the eye which helps to bring the subject to life.
What’s the Technique?
Essentially you want to use the same exposure settings you would for natural daylight and aim to expose for the highlights. The fill-in flash then brightens up any shadow areas but won’t affect the lit areas. Once you’ve set your exposure you want to reduce the flash output from its automatic setting. If you’re using on-camera flash, with the TTL option, reduce the power of the flash by around -1 and 2/3 EV. This is a good setting to start from. If filling the frame with dark subjects such as a purely black coloured bird for example you might need to reduce the flash more, even down to -3 EV, as the flashgun will want to put out too much flash. It’s often about experimenting; remember – the idea is to add just enough flash to improve the image, with it barely being noticeable. Alternatively you may be able to change the flash output manually in which case you could try around 1/16 of full power. On my camera, the Canon 1DX Mark i, I can actually change the flash output in camera using the flash +/- compensation dial – this is perfect as it means I don’t need to take my eye away from the camera.


On many flashguns you’ll notice a zoom setting. This allows the flashgun to fire the flash at a similar angle of view (mm) to the lens being used. This should automatically change when the flash is attached to the hot-shoe – if not you can alter it manually. An important point to note is the flash synchronisation speed. Most cameras have a maximum shutter speed that will synchronise with a flashgun, often around 1/250 of a second. Use a faster shutter speed than this and the two won’t work together properly. To enable the flash to synchronise with a faster shutter speed you need to use the high speed sync option. On the Speedlite you will see the flash symbol and a ‘H’ next to it. When this is selected your camera and flash will work together with up to the fastest shutter speed available. This is particularly important due to the fact that when shooting wildlife, in natural light, you’ll often be using a fast shutter speed.
Recycle Time and Batteries
You won’t be able to continuously shoot with your flash unless you have an extra battery pack. I tend to do single shots and let the flash recycle; within a second or two it will be ready to fire again. Use rechargeable batteries in your flashgun. Better than alkaline, I’d recommend the NiMH (see Eneloop) – these hold charge better and have great reviews.
Red-eye Problems
You may occasionally get ‘red-eye’ when using fill-in flash. This is where the light reflects from the retina and straight back through the lens. Using a flash further away from the camera will help to avoid this; in some cases it might be necessary to mount the flash separately to the side of the camera. I’ve also found that angling the flash away (whilst still on the hot-shoe) can also help if the flashgun has this facility.
See the slight Red-eye in this image of a male Mallard

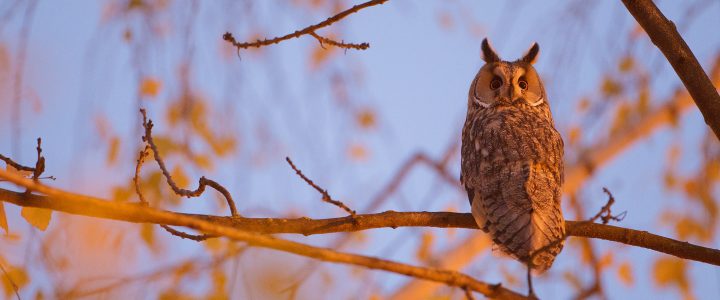
A word about using flash with wild creatures: research suggests that flash used in daylight will have no detrimental effect on the subject. I agree with this and I don’t see issues using fill-flash on wild birds and animals. However, using flash as the main light source, e.g. shooting at night is very different. This has been shown to temporarily blind owls for example and should be seriously considered. You’ll find some useful information on this topic in these blogs from Tom Mason and Keith Elcombe A much better option in my opinion is to use LEDs.
Diffusers and Extenders
Using a diffuser on the flashgun is unlikely to soften the light at a distance; this is because the diffuser spreads light out rather than softens it. If you do use it in the field you’re also going to have to increase the flash output which will increase battery consumption. My own view is that a diffuser may improve the quality of flash light at a short distance. Extenders on the other hand work by concentrating the flash into a narrower field of view – they are more direct and therefore sensible to use in the field. Better Beamers are a popular option although they usually require a separate arm to move off camera to get the best effect.
There’s plenty to learn when it come to Fill-in Flash. The easiest way is to simply practice on a static subject outside, adjust your settings and see what works. Remember: you are still using natural light as your main light source – the flash just acts as a secondary light source to brighten the shadows, lift the image a little, and add a catch-light to the eye. Above all – don’t over-do it!


